How to Make Your Whites Whiter in Photography |  |
- How to Make Your Whites Whiter in Photography
- Innovative Photographer Shows Us How to Make Indoor Clouds (Video)
- 10 Surefire Ways to Annoy a Photography Snob (Video)
- Interesting Photo of the Day: Chicago Over the Clouds and Upside-Down
- Crop Factor: Why Does Your Camera’s Sensor Size Matter? (Video)
| How to Make Your Whites Whiter in Photography Posted: 03 Apr 2014 02:00 AM PDT When talking about getting the right colours in your photos the best place to start is to talk about white balance. If you don’t know what white balance is, how to adjust it on your camera, or why you would want to in the first place, then this article will help. 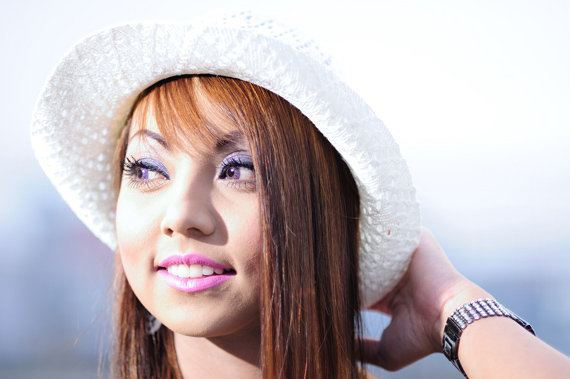 “Morning Strobe – Diana” captured by Khairil Faizi (Cloudy White Balance) Adjusting the white balance in photos can make a huge difference in the visual experience. The correct white balance in a photo means that what you saw with your naked eye matches what is represented in the photo. You may ask why the camera doesn’t automatically capture the same colours that you see. After all, you are looking at the same thing your camera is looking at, right? Wrong! 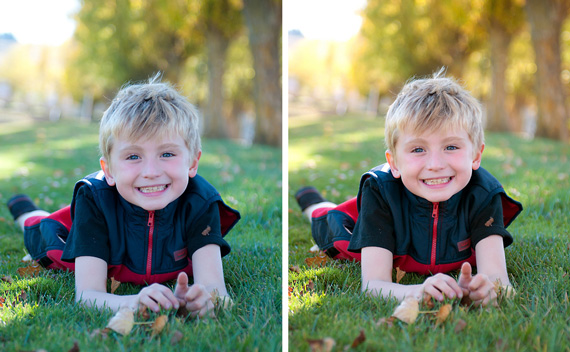 “Spyder Cube” captured by 707d3k (White Balance Adjusted on Right) The human eye actually processes then adjusts the colours you see to take into account the type of light and conditions under which it is working. While some cameras have an auto feature that makes a guess as to the type of light, these cameras are yet to replicate the level of adjustment to light that the human eye is capable of. This simply means that different light sources produce different “colours” or “temperatures” of light. This is due to the different ways or extents to which they bend or make light (a lesson for another day perhaps!). What you need to know is how to correct some of the most frequently used types of light. Thinking of the light as temperature may help you understand how to adjust the white balance. Like a room, if the photo is “cooler” (everything seems to have tints of blues, greens, or greys) then you are going to need to “heat up” the photo by adjusting the settings to warmer. The opposite is true if the photo is “warmer” (everything seems to have a tint of reds, pinks, oranges, or yellows). Here are some of the basic types of light you may encounter. Most cameras have some or all of these settings. It may be worth checking your camera’s manual to find out more. 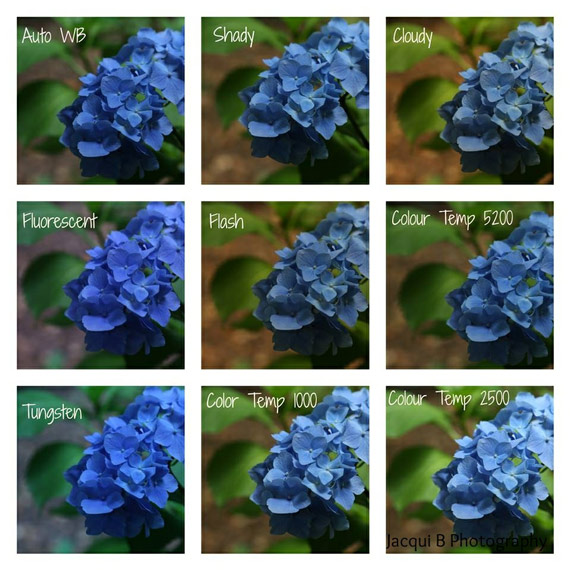 “Comparing White Balance” captured by Jacqui Barr TungstenThese are lights and lamps that use bulbs or incandescent light. If you’ve ever looked extra pink or maybe even orange in a photo, you probably took them with a few lamps on or next to bulb lights. The tungsten setting on your camera is usually identified with a light bulb. Using this will cool down this “warm” lighting. 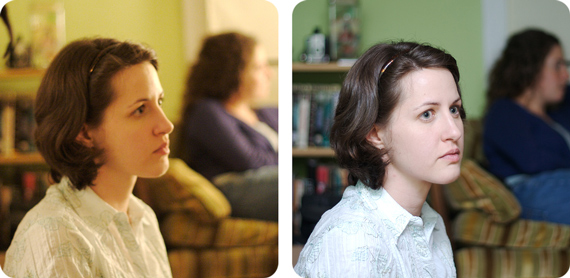 “Lighting Comparison” captured by Kevin O’Mara (Tungsten vs. Auto White Balance) FluorescentFluorescent lights are what are usually used in industrial buildings such as schools or offices. The Fluorescent setting on your camera is usually identified with a rectangular light source with rays coming off the top and bottom. Much like the lights sometimes used in changing rooms, fluorescent lights can make your skin appear gray, green or bluish. Using the Fluorescent setting will warm up this “cool” lighting. Daylight/SunnyDaylight is not always a setting on every camera but if you have it the conditions can best be described as your normal setting. It is self-explanatory so we won’t waste time telling you anything other than, if you’re an adamant auto-setting user and find yourself standing in nice pleasant midday sun, give it a try. It’s always good to try it and see the difference between the two. 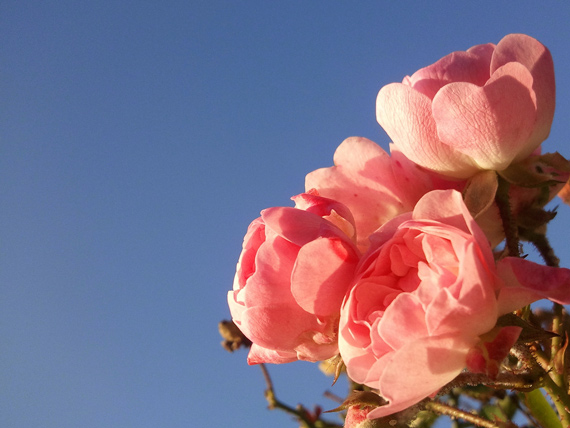 “Pink Flowers” captured by Malte Ahrens (Daylight White Balance) CloudyCloudy settings are usually cooler. The setting for cloudy days is very similar to the setting for fluorescent lights except cloudy days can require even more “warming up” than fluorescent lights. 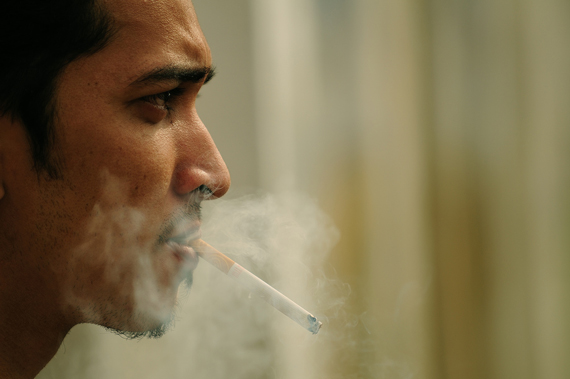 “Empty Stare” captured by Khairil Faizi (Cloudy White Balance) FlashThe Flash setting for white balance is symbolized by a bolt of lightning. It takes the cooler temperature of the burst of flash from your camera or an attached flash and warms it up. The flash setting warms up a cool situation and is somewhere between the daylight cool and the cooler cloudy day situation. ShadeThe shade setting for white balance is symbolized by a house with diagonal lines from the side to the ground next to it. This setting is typically the coolest of the setting and provides the most warming up of all the normal settings. 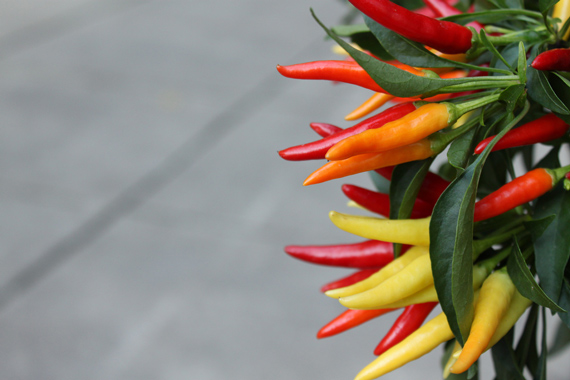 “Day 3 – Natural Light – ‘Shade’” captured by Elycia (Shade White Balance) Manual AdjustmentsMost cameras have preset white balance controls that will do the trick of making your whites whiter, but if you have a super fancy camera such as a DSLR or high end point and shoot you may have a manual adjustment for making your whites precisely white. Simply take a photo then select which part of the photo is supposed to be true white then the camera will make an adjustment. If you are shooting something like a wedding and want to make sure the whites look their whitest you can spend a little cash on some white (or gray) cards that you can photograph to make sure you’re actually photographing something that is true white. A cheaper option is to photograph a piece of white paper. Exceptions to the RulesSometimes you may not want your whites to be exactly as you saw them. There is no rule that says you cannot use any of the settings for a different condition than it was intended. Using the opposite settings as recommended can intensify the colours making whites redder or bluer depending on which way you take them. Feel free to try it out! About the Author: Go to full article: How to Make Your Whites Whiter in Photography |
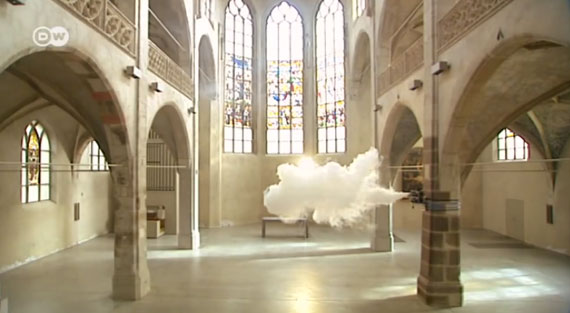
| Innovative Photographer Shows Us How to Make Indoor Clouds (Video) Posted: 02 Apr 2014 03:25 PM PDT Seeing a perfectly-formed cloud indoors can be a jarring sight. For Dutch photographer Berndnaut Smilde, it’s a living. Since 2010, he’s been working on an ongoing photo series of clouds floating within mansions, beside fashion icons and, as the video below shows, in vacant German churches:
Smilde, who lives in Amsterdam, has reached international fame with these cloud shots. He shoots water vapor from a can into the air, then unleashes a fog machine. In Smilde’s words, the vapor sticks to the smoke and pulls it down to create a realistic cloud replica. He places a strong backlight behind the cloud to give it sun-like rim lighting. The work in progress looks like this:
…While the final products remove the fog machine altogether, giving the clouds a peculiar isolation:
Go to full article: Innovative Photographer Shows Us How to Make Indoor Clouds (Video) |
| 10 Surefire Ways to Annoy a Photography Snob (Video) Posted: 02 Apr 2014 02:01 PM PDT If you know any sticklers for pictures, their constant criticism might get to you. Use the wrong lighting or light balance, and they’ll furrow their brows and stare you down disapprovingly. Thankfully, DigitalRev TV has compiled 10 handy tips to make sure you know exactly how to piss off your snobbish friends, whether you want to or not: The 10 supposedly faulty behaviors in question are as follows:
 “It’s a DSLR. It’s not meant to be in P mode.” We’ve enjoyed these guys’ humorous take on pro photography before, when they endorsed DSLR kit lenses. But the six minutes of this video might be their most spot-on satire yet. Are you a photography snob? What would you add to this list? Let us know in the comments. Go to full article: 10 Surefire Ways to Annoy a Photography Snob (Video) |
| Interesting Photo of the Day: Chicago Over the Clouds and Upside-Down Posted: 02 Apr 2014 12:17 PM PDT Last month, Mark Hersch was flying home from a business trip. He usually takes the aisle, but this time he was given a window seat. Even though he’s flown dozens of times before, this was the first time he looked out the window, straight at the sun, and saw his home city of Chicago beneath the clouds, reflecting in a pool of sunlight in Lake Michigan:  Can you spot the plane hidden among the clouds? (Via Imgur. Click for larger picture.) Hersch, an an amateur photography enthusiast, whipped out his smartphone and didn’t hesitate once he saw the spectacular view. As he told the Daily News:
The image went viral, even prompting one social media user to turn it into a brilliant Batman Versus Superman poster:  Graphic artists, take note. (Via Imgur. Click for larger image.) Maybe this will launch Hersch’s photography career after all. Remember: it’s not the equipment, but the photographer that makes the shot. Go to full article: Interesting Photo of the Day: Chicago Over the Clouds and Upside-Down |
| Crop Factor: Why Does Your Camera’s Sensor Size Matter? (Video) Posted: 02 Apr 2014 10:34 AM PDT If you’re shopping around for a new camera or lens, you’ve got to consider the crop factor—how much of what you see in the viewfinder is actually being cropped out of the final image. Unless you’re shooting with a full-frame camera, you’re going to suffer some degree of cropping. This video breaks down the effects—and how to bypass them—pretty effectively. There’s a fair bit of math involved with this one. But don’t worry, we’ll break it down after the video: What is Crop Factor?Crop factor is the amount that a camera crops the image seen in the viewfinder. In the video, Tony Northrup uses three sample cameras with different crop factors:
For consistency, Tony attaches each camera to a tripod-stabilized 70-200mm lens locked at 100mm. The three cameras produce wildly different shots:
It’s actually easy to understand why this is. Just multiply the crop factor by your zoom setting. Tony was shooting at 100mm, so 100 (lens mm) x 2 (Olympus crop factor) = 200. This means even though the lens was set at 100mm, he was actually shooting at 200mm—which is why the image is so much tighter.
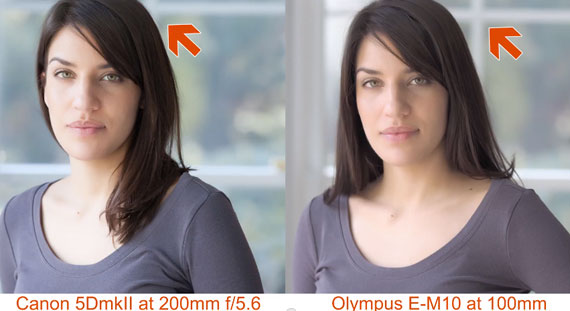
How Crop Factor Affects BokehBut zoom range isn’t the only aspect affected by a smaller sensor. Backgrounds are also altered. Take a look at the following comparison between the 5D Mark II and E-M10, even once he zoomed into 200mm to level the playing field:
The full-frame camera captures a softer, blurrier background. There’s also the issue of noise to consider, because smaller sensors capture less light; the Olympus doesn’t catch light as pleasantly. But this isn’t unsolvable. It just means that, in order to understand true aperture with a small sensor, you need to multiply that by the crop factor, too. To achieve the same bokeh you can jog up the aperture on the 5D to f/5.6:
How Crop Factor Affects LensesLet’s assume you have the Olympus camera with a micro 4/3 sensor. You’re shooting with the Olympus 45mm f/1.8 lens. You might assume that, when compared with a Canon 85mm f/1.8 lens on a 5D Mark II, they’d be identical, right? Because Olympus has a 2x crop factor, and 45 x 2 = 90mm, which is close to 85mm. But that’s not taking into account the aperture affectation, which actually transforms it into a 90mm f/3.6 lens. It’s a bit of a sneaky move by camera manufacturers, and a misrepresentation of the lens’s true abilities when matched with a small sensor camera. (Which most non-professional photographers use.) Are Smaller Sensors Always Worse?No, they’re not. But if you can’t afford a full-frame body yet, you’ll need to be aware of how they operate in order to take comparable shots. Like here, where the images are truly the closest so far:
By dropping two f-stops and cutting your ISO down to reduce noise, you can get a really nice image quality with soft bokeh and natural lighting. You just need to know how to manage the effect. Go to full article: Crop Factor: Why Does Your Camera’s Sensor Size Matter? (Video) |


| You are subscribed to email updates from PictureCorrect Photography Tips To stop receiving these emails, you may unsubscribe now. | Email delivery powered by Google |
| Google Inc., 20 West Kinzie, Chicago IL USA 60610 | |
No comments:
Post a Comment