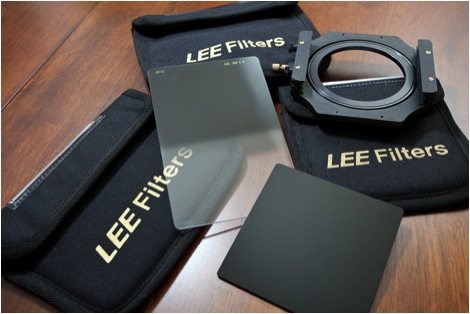
Lee 3 stop graduated neutral density and 10 stop neutral density filters and holder
Editor’s Note: This is a guest blog posting by Travis Lawton, the Lawtographer—one of the most genuinely friendly photographers I know.
The Argument for Using a Filter
I know what you’re saying, “I thought this was a post about using filters. What is this guy talking about?”.The reason for the build up is that many people think that if a filter is needed, they’ll just apply one in Photoshop after the capture. There’s a couple reasons why this isn’t the best method.
First and foremost, good luck pulling detail and color back from an overblown sky because you were exposing for the foreground (unless you planned to blend multiple exposures later on in the computer). And speaking of working in Photoshop, you’re guaranteeing more work for yourself sitting in front of the computer screen because you’ll have to “add” your filter to all your images. Also, depending on your editing methods, you may be actually hurting your images using destructive editing processes.
Have I ever used filters in post-production? Absolutely, but this is usually to enhance images that were already captured using physical filters.

Neutral Density Filters
There are several filter options out there and they range in price from “cheaper than I thought,” to “holy cow these things are expensive”.Some of the more popular brands are Cokin, Lee, and Singh-Ray. Cokin filters are a great starting option as they are more budget-friendly and give reasonable quality while the more expensive filters will be much higher build quality and will give better, and more consistent results as well as less color casting from stacking multiple filters.
The most popular/common filter is one that looks like one half is clear and the other half is a particular shade of gray. This is called a graduated neutral density, or GND, filter. These are what we will focus on today. Others include neutral density (ND) filters to darken the entire scene allowing for a slower shutter (ever seen a waterfall photo that looks like the water is flowing), colored filters to add a specific color to the image, and even specialty filters like the star effect filter. We’ll concentrate on GND and ND filters in this post.
So you’ve purchased a filter or two, the holder, and the correct sized adapter ring for the lens you’re going to attach the filter(s) to, now what. How do you use the darn things?
Using The Filter
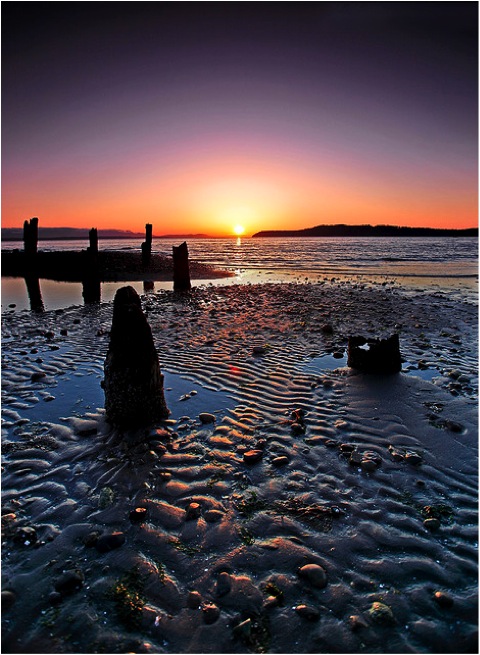
Once you understand what the filter is actually doing, it’s pretty easy to understand how to use them. Let’s talk about the most popular subject for using these filters, sunrises and sunsets.The problem has to do with the dynamic range that your camera can “see” in one exposure. Dynamic range refers to the ratio between the lightest part of the scene to the darkest part that can be seen or recorded. A typical sunset could have a dynamic range of 15-20 stops of light. This isn’t a problem for you because the human eye has a dynamic range of approximately 17 stop, therefore, you can see the bright, colorful sky along with the details in that shadowed rock on the ground with ease.
The problem is the camera, which typically will have a dynamic range of 8-11 stops. The math just doesn’t add up for a camera to be able to capture the whole scene without a little help.
Once again:
Sunlight = 15-20 stops of light
Human eye = 17 stops of light
Camera = 8-11 stops of light
See why you can’t capture a moment exactly as how you see it?
For many of these scenarios, the difference between the foreground and the sky is 2-5 stops of light. If you haven’t noticed already, the ND or GND filters come in different stops. You can purchase a 1, 2, 3 stop and so on, even up to 10 stop filter.
For sunrises or sunsets, the key is to expose your scene correctly for the foreground, knowing full well that if you were to take the picture right then, the sky would most certainly be all white/blown-out or at very least, unusable in that image. Here is where you slide that graduated neutral density filter in place, lining up the horizon of the image with the middle of the filter so the sky is covered by the darkened side. This won’t change the light hitting the sensor from the lower half (which you’ve set your exposure for) but will lower the light hitting the sensor from the top half, hopefully evening out the total exposure.
That’s the simple version, but how about we get a little more detailed and talk math and numbers to nail an exposure perfectly. I know the word “math” can scare a lot of people as most people like to avoid it like the plague but this is pretty easy.
The Math
First thing, before anything else is to switch your camera to manual mode.To some people this is the mode your camera is in all the time but for others, the dreaded “M” on that dial is scary and mysterious. If you don’t use your camera in manual, you would greatly benefit by taking a little time to do so and for the sake of capturing extreme lighting conditions (like sunrises and sunsets), manual rules as the king as you get consistent results from every shot.
Next, switch your cameras metering mode to Spot Metering. This will make the camera give you the correct exposure for the very center of the frame (usually the center 1-5% of the frame).
- Point the camera at the foreground and adjust your settings for a correct exposure based on the cameras exposure reading.
- Now point the camera at the sky just above and check the reading.
Now calculate how many stops it is overexposed That’s how many stops you need in your filter(s) to balance the scene. Pretty simple, huh?
For more on metering, you can check out this piece on the dark art.
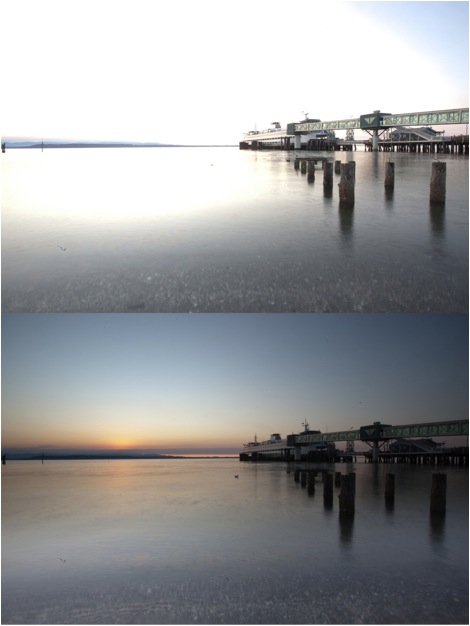
Both images were spot metered for the sand at the very bottom of the image. Camera settings for both images were 1.6 second shutter, f/22 ISO 100. Only difference was the inclusion of a 3 stop GND on the bottom image. You can see that the bottom image will be much easier to work with in Photoshop
Next step, look at the image and exclaim (either audibly or not) how awesome you are.
The settings that were dialed in for proper exposure of the sand but 2 stops overexposure of the sky is be negated by the 2 stops light reduction of the filter. Perfect exposure in a single image achieved.
Keep in mind that if you have them, you can stack multiple filters, IE if the difference of sand and sky was 5 stops, you could stack a 2 stop and 3 stop together. What happens if you don’t have the exact filters to nail the exposure math? No big deal, using a filter in the first place will get you a better image than if you didn’t have any and you can hopefully finish the image in Photoshop to compensate.
You can see more of Travis’s work at his site and on his blog.
Read more:
Using and Choosing the Right Neutral Density Filter for Landscape Photography
No comments:
Post a Comment