10 Tips for Self Portrait Photography |  |
- 10 Tips for Self Portrait Photography
- Using Light Painting Photography to Create Ethereal Scenes
- Interesting Photo of the Day: Supercell Storm Brewing
- Expedition to Iceland for Timelapse Photography
| 10 Tips for Self Portrait Photography Posted: 07 Aug 2013 05:53 PM PDT Self portrait photos are becoming increasingly necessary in the modern world. Think about social media. Whatever platform you sign up for requires you to upload an avatar of some kind. Whenever you go online and look at photos of your friends on Facebook, Google+, or other social network, you see poor quality shots that often look clichéd and cheesy. Follow these quick and easy tips, and you’ll be miles ahead of the curve:  Use a remote trigger instead of a timer can be useful when taking a self portrait with your pets. ” I never meant to cause you trouble” captured by Gibson Regester. 1. Have you ever used the timer on your camera? If you don’t have a remote control, this is the next best option. Of course, I would recommend getting a remote control eventually. They’re not too expensive. If you set your camera’s timer to have a delay of around 5 to 15 seconds, you’ll have enough time to get in the frame, strike a pose, and let the magic happen. 2. Use Google Images to find a focus target that you can download and print out. It’s super easy to do. You can then stick the target to the wall behind you at head level and use it to focus. Another little tip here is to stick on some coloured tape to mark the point where the bottom of the picture should be. It will probably be level with your chest, for example. 3. One way that you could easily go wrong with self-portraits using a timer is to not know precisely where you’ll be standing, which could mean you to stand too close or too far away from the camera after you’ve set the focus. The simplest solution to this is to mark another spot, this time on the floor, to know exactly where your feet will be. You don’t have to do anything too fancy here–just a spot where the front of your feet will be, for example. 4. You should be using manual focus for this. Manual focus enables you to use your guides to work out the frame then get the focus of your target worked out perfectly. 5. It is best to allow for slight variations in your depth of field. You can do this easily by using an aperture of around f/10, which will mean that your face will still be in focus even if your distance from the camera is slightly off from when you set up the focus. 6. If you have a laptop or small flat-screen TV, using this can be a better approach than using the timer delay that I mentioned in step 1. Just hook up the computer or TV to your camera so that you can view the screen to know exactly where you are in the frame. This way you can get yourself lined up and make sure you are in focus before taking the shot. This method requires a remote to activate the camera. 7. What if you want to take photos of yourself with your children or a pet? Kids and animals move around a lot, and the timer delay probably won’t work well. Have you ever heard of PocketWizards? They can be extremely useful tools. Wire up a PocketWizard transceiver with a pre-release cable, and hook that up to your camera. Turn on the trigger cable switch (which is the same as pressing your shutter button halfway) with the camera set to continuous focus. Once your kids are smiling or looking at the camera, you can quickly capture the shot.  Look to unusual places for unique self portrait opportunities. “Down Is The New Up” captured by Lecates. 8. Alternatively, try to come up with an original place to take a self portrait. You can come up with some pretty unusual places to take a photo of yourself that no one else will have thought of. This doesn’t mean you have to venture out to the Grand Canyon to get a brilliant picture of yourself, and you probably don’t even need to explore any further than around your house. One great example is to put your camera inside your kitchen fridge and take a shot of yourself from there with the fridge door open. You probably won’t find any other friends who have a self shot like this on their Google+ account! Let your creativity run wild with ideas for places to shoot. 9. Another option for you if you don’t have home studio equipment is to use a camera with a screen that rotates and flips. This way you can see yourself on the small screen before you take the shot (I would still recommend using a small TV set if you have one). 10. Get a GorillaPod. This will allow you to attach your camera around a climbing frame, branch of a tree, and lots of other objects. You’ll be able to get shots that you wouldn’t even dream of by attaching your camera to unusual objects in this way. Many of the methods I’ve laid out for you in this article can be done at a reasonable price. I hope you found this useful and enjoyed learning my top ten tips on how to get better self portrait shots. About the Author: Further Articles on PictureCorrect: Go to full article: 10 Tips for Self Portrait Photography |
| Using Light Painting Photography to Create Ethereal Scenes Posted: 07 Aug 2013 03:11 PM PDT Viewers of Jason D. Page‘s light paintings often assume his artwork is the result of Photoshop trickery. But Page captures his colorful, dream-like nature scenes using just one exposure in real-time. He wanders out into the dark woods, locks his shutter open, and “paints” color and light onto his subjects to create his fantastical imagery without the aid of post-processing.
Watch the following video to learn more about Page’s technique and artistic vision (for those of you reading this by email, the video can be seen here): Inspired by Dean Chamberlain‘s work, Page has worked to recreate a vivid dream he experienced during a tragic childhood event. He remembers trying to get back into the dream, where he saw a beautiful, vibrant forest. Now, using long exposures and handheld light sources, he is able to take himself into the euphoric world he pictured in his mind.
For Further Training on Light Painting:Look into this best-selling eBook on how to do many photography techniques that produce unusual, eye-catching results (including extensive chapters on various light painting methods). The new version can be found here: Trick Photography and Special Effects Go to full article: Using Light Painting Photography to Create Ethereal Scenes |
| Interesting Photo of the Day: Supercell Storm Brewing Posted: 07 Aug 2013 12:51 PM PDT Looking like a scene from The Wizard of Oz, this remarkable photo shows an ominous supercell storm descending on a farm in Nebraska. Professional photographer Camille Seaman explains her thought process prior to capturing the photo:
The resulting photo certainly was unusual in the best possible way, contrasting the menacing but beautiful swirling forms of the storm clouds against the orange glow of the sunset and white clouds parting to reveal a glimpse of blue sky. Camille Seaman’s photography has been featured in publications such as National Geographic and Newsweek. She used a Canon EOS-1Ds Mark III to capture this photo. Go to full article: Interesting Photo of the Day: Supercell Storm Brewing |
| Expedition to Iceland for Timelapse Photography Posted: 07 Aug 2013 10:34 AM PDT In June 2013, photographer Eric Hines embarked on a 17-day, 4,000-mile adventure across Iceland, which he dubbed “Expedition Iceland.” The resulting timelapse video features stunning examples of the country’s rugged natural beauty (for those of you reading this by email, the timelapse video can be seen here): Some of the still shots from the presentation can be viewed below. The whole project was shot using a Canon 5D Mark III.
The trip also resulted in plenty of behind-the-scenes photos. For his motion-control equipment, Hines used a Kessler Crane CineDrive. 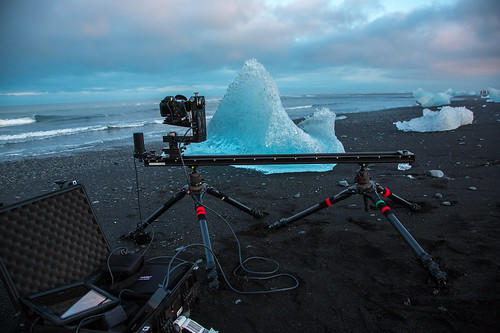 Provided by Eric Hines 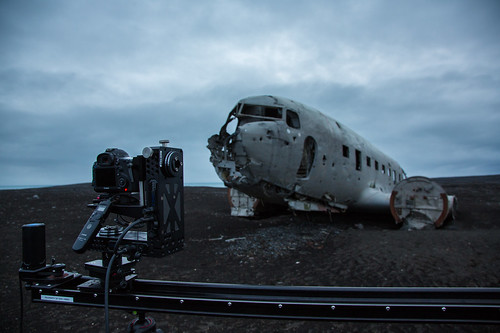 Provided by Eric Hines 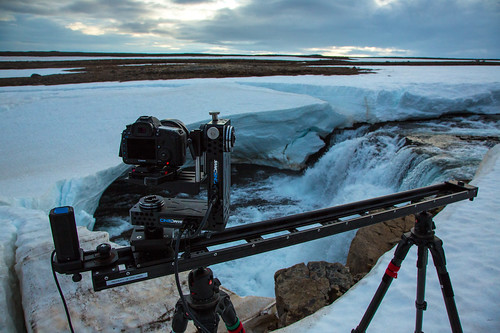 Provided by Eric Hines 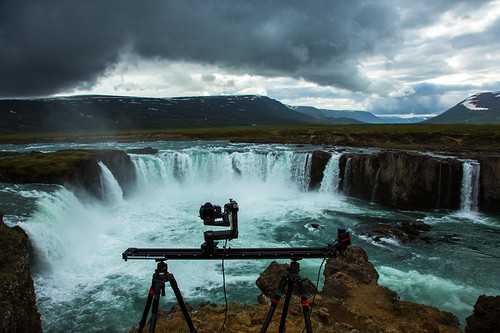 Provided by Eric Hines 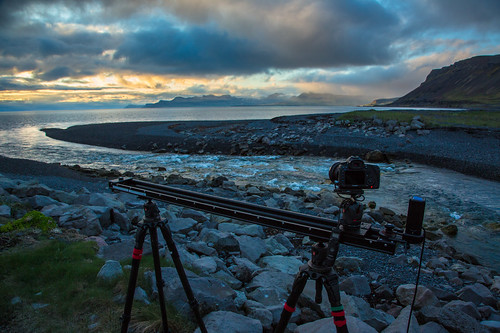 Provided by Eric Hines  Provided by Eric Hines 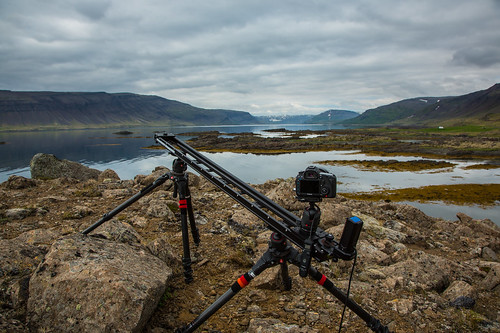 Provided by Eric Hines For Further Training on Timelapse Photography:There is a COMPLETE guide (146 pages) to shooting, processing and rendering time-lapses using a dslr camera. It can be found here: The Timelapse Photography Guide Go to full article: Expedition to Iceland for Timelapse Photography |
| You are subscribed to email updates from PictureCorrect Photography Tips To stop receiving these emails, you may unsubscribe now. | Email delivery powered by Google |
| Google Inc., 20 West Kinzie, Chicago IL USA 60610 | |


No comments:
Post a Comment