Wedding Photography: How to Maintain Ambient Background Light by Bouncing Your Flash |  |
- Wedding Photography: How to Maintain Ambient Background Light by Bouncing Your Flash
- Hyperlapse Tutorial: How to do it from Start to Finish (Video)
- The Endless Perspectives of Architectural Photographers: 12 Great Shots
- Bold Photographer Attempts to Take Headshots of Other Photographers (Video)
| Wedding Photography: How to Maintain Ambient Background Light by Bouncing Your Flash Posted: 25 Sep 2013 10:16 PM PDT Weddings, by their nature, have very beautiful background scenery. This scenery is carefully planned and set up hours before the big day. For these reasons, you want to include it in your photos–that is, not just have the subject of the photos lit up by your flash, but everything behind in shadows, too. This is referred to as the miner’s light.  “Untitled” captured by Grigoryev Sergey (Click image to see more from Sergey) You also don’t want to be just shooting with extremely high ISOs for the whole wedding with no flash. This is a good technique for certain photos, but many times this makes the pictures appear as if they were cropped from bigger pictures. Another reason you don’t want to use this technique for all of your photos is because sometimes there is fast action that you need to catch, and you probably don’t want the subject’s face out of focus. So how do you shoot in low light situations, have the backgrounds visible, and have your subjects properly exposed, but include no harsh shadows and stay in sharp focus? The answer is bouncing your flash. To properly expose your wedding couple and not have your flash producing harsh shadows on their faces, you need a bigger light source. Remember, the bigger the light source, the softer the shadows. That is why, when you use an umbrella, the shadows are so nice and soft. The umbrella is the source of light, and it is a lot bigger than your flash. This is the way it is, and there is no way around it. Those little cups that you put over your flash do not make the shadows softer–they only even out the light so that there aren’t any hot spots. Other light modifiers you see do increase the size of your light source. Examples of these may be the big Tupperware-looking things you see, or else a large bounce card. But wouldn’t the shadows be even softer with a bigger light source? How about one the size of a wall or ceiling? This is what bouncing your flash is: turning the head of your flash so that the light first bounces off a wall, ceiling, etc., before hitting your subjects. This increases the size of your light source. I like to bounce my flash off corners, if possible. The corners where the walls meet the ceiling produce some very nice results. If you have an assistant, make sure they are bouncing the light for you. Now you just have to worry about your camera communicating with your assistant’s lights. If you’re going wireless, or you are connected through a cable, no problem. If you’re going through Nikon’s or Canon’s incorporated system, you just need to make sure your flashes can see each other. When bouncing your flash to work in low light situations, I recommend you have your ISO bumped up to 1600. This is a big difference from 3200 and higher, and with cameras nowadays, the grain at 1600 isn’t too noticeable. Also, I advise that you shoot at an aperture of f2.8 to get the ambient light. The big bonus of bouncing your flash, besides having softer shadows, is that the background is exposed based on your ambient light. Adjust your camera settings so that you are underexposing the ambient light two to three stops for good results. This way, the flash properly exposes your subjects, as they are the dominant element of the photo. The background is also exposed, but it’s a little bit dimmer and not competing for attention. Don’t worry about your shutter speed being below 1/60 of a second, because the flash will freeze the action. If the couple is dancing fast and you have the flash bouncing to expose their faces, you will see that the flash freezes the action on their faces and that they in sharp focus. The people in the background may be blurred, since they are being exposed with the ambient light. This makes for some interesting and creative photos. On the dance floor my setting might be ISO 1600, f2.8, and a 1/10 or 1/20 shutter speed.  “First Dance” captured by Natalie Milissenta Shmeleva (Click image to see more from Natalie Milissenta Shmeleva) Try bouncing your flash at the next wedding you shoot and see if you like the results. About the Author: For Further Training on Wedding Photography:There is a comprehensive instructional eBook package for aspiring wedding photographers and has guidance on virtually everything to start a business. With 189 pages of information and many other materials such as shot lists and sample contract templates, it is designed for any level of photographer interested in wedding photography. Found here: Digital Wedding Secrets Go to full article: Wedding Photography: How to Maintain Ambient Background Light by Bouncing Your Flash |
| Hyperlapse Tutorial: How to do it from Start to Finish (Video) Posted: 25 Sep 2013 06:18 PM PDT Creating timelapse videos can be expensive. To make a moving timelapse, many photographers use a motorized dolly system, which can set you back hundreds of dollars. Luckily, clever photographers have devised creative ways of making timelapse videos on a budget. In this tutorial, Morton Rustad shows us how to create a hyperlapse sequence with a camera and tripod: Hyperlapse Shooting Tips
Hyperlapse Post-Production
The photographer in this tutorial prefers to start his post-production work by importing all of the photos into Lightroom. Choose one photo and adjust it in the Develop module before applying the settings to the rest of the sequence with the synchronization command. Next, exports all of the photos at full size. Once the photos are adjusted and exported from Lightroom, they can be imported into AfterEffects as a JPEG sequence.Use the warp stabilizer to quickly correct for any shakiness or imprecise alignment in the photo sequence.
The last step in creating the timelapse video is to open the files in FinalCut Pro or a similar program for rendering. You may choose to crop your files to fit with the HD 16:9 aspect ratio, add music, etc. The final hyperlapse movie can then be saved and uploaded. Using a tripod, camera, and interval remote to create a hyperlapse takes a bit of practice to get right, but it’s a much cheaper alternative to making a timelapse video with expensive hardware. For Further Training on Timelapse Photography:There is a COMPLETE guide (146 pages) to shooting, processing and rendering time-lapses using a dslr camera. It can be found here: The Timelapse Photography Guide Go to full article: Hyperlapse Tutorial: How to do it from Start to Finish (Video) |
| The Endless Perspectives of Architectural Photographers: 12 Great Shots Posted: 25 Sep 2013 02:12 PM PDT Modern architecture is generally characterized by simplification of form and an absence of applied decoration. Because of it, in architectural photography, a photographer usually experiments with various angles, settings, timing and effects to achieve the most interesting shot of buildings. In this post we have gathered some of extraordinary architectural photos. Enjoy the view!  photo by Sheryl Thomas  photo by Jay Gould  photo by Oscar Degetau photo by Mark Feliciano  photo by Sheryl Thomas 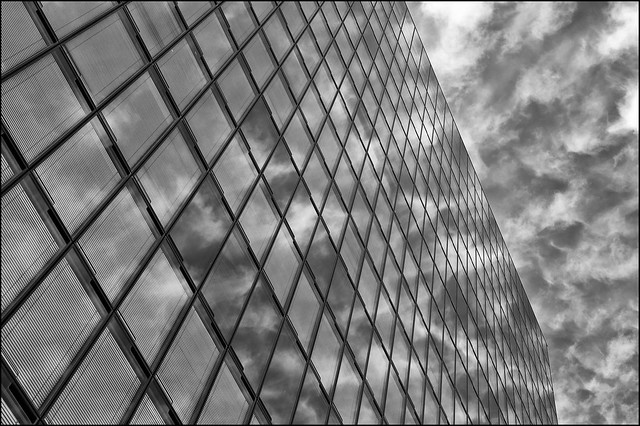 photo by Nietnagel  photo by Joseph Blasco 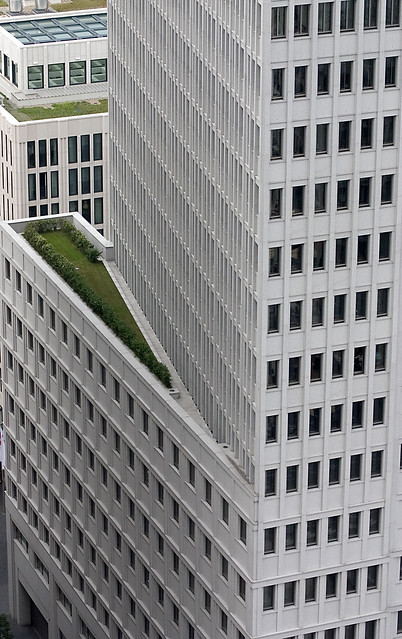 photo by svenwerk  photo by silentemotions 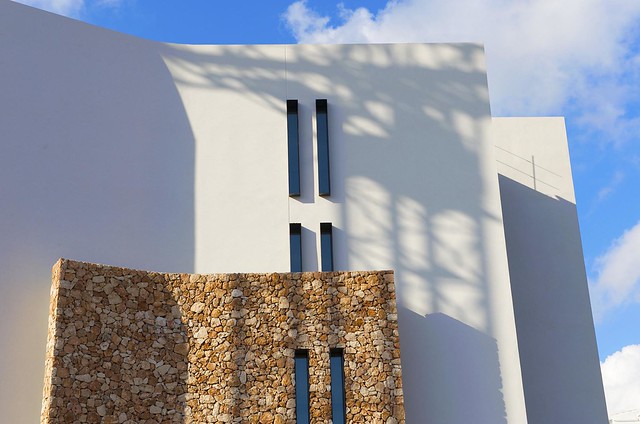 photo by THOR 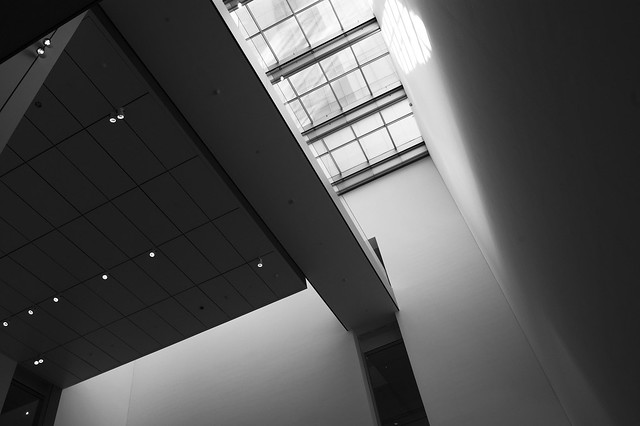 photo by Louis Clotman  photo by Oddgeir Hvidsten Go to full article: The Endless Perspectives of Architectural Photographers: 12 Great Shots |
| Bold Photographer Attempts to Take Headshots of Other Photographers (Video) Posted: 25 Sep 2013 11:24 AM PDT I often wonder if there’s some force that pulls photographers behind the lens—or if we just run there for fear of having our own pictures taken. And is it a similar kind of self-doubt—or just the artistic temperament—that causes some of the best photographers to continually strive to be better, to often feel like they’ve fallen short? Uncomfortable in front of the lens and unsettled behind it, it’s safe to say that photographers can have a complex relationship with their craft. This tension is what makes Dani Diamond‘s “The Project” all the more interesting: In an interview, Diamond confirmed the awkwardness on both sides of the camera, saying:
So there’s a guy who’s a nervous wreck taking pictures of a person who’s uncomfortable having her picture taken. If that sounds like a recipe for disaster, that’s because I tried to make it sound that way, for the sake of a little drama. Everybody—photographer and photographers—has been very happy with the results. Diamond spends some time chatting with his peers/subjects prior to the shoot, and then they walk the streets till the light is right. He says he shoots his portraits almost exclusively with his Nikon D800 and 85mm prime lens with the aperture wide open. Watching the video, you see him and his subjects in many visually interesting locations, which his f1.6 setting on the lens distorts into some stunning bokeh. At first, I thought it was a shame to waste such good backgrounds, but when you look at his shots, you can how see they really work: the backgrounds consistently match or complement the colors of his subjects’ skin tones, clothes, hair, and eyes. And the expressions that he captures show anything put a person nervous in her own skin having her portrait done.
Diamond’s taken some remarkable shots, and The Project has taken off. When he started The Project, he had to solicit amongst his circle of friends—real-life and virtual—to find people willing to sit for him. Now, with a Facebook group that’s got nearly 700 members, he’s been inundated with requests. The group’s photo album has all 22 portraits he’s released so far, and Diamond posts when he’s traveling to some place new and is looking for more subjects. Go to full article: Bold Photographer Attempts to Take Headshots of Other Photographers (Video) |


| You are subscribed to email updates from PictureCorrect Photography Tips To stop receiving these emails, you may unsubscribe now. | Email delivery powered by Google |
| Google Inc., 20 West Kinzie, Chicago IL USA 60610 | |
No comments:
Post a Comment