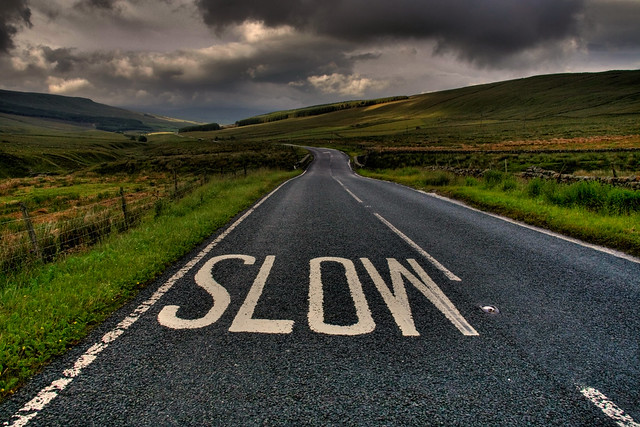
| 13 Photos from Photographers on the Road Posted: 04 Jan 2014 08:57 PM PST Not all those who wander are lost. Some of these photos are taken during those travels, wandering around and exploring places. Incredible sights on the road are captured in these photos. Take a look and enjoy the ride! Slow down and take your time. Enjoy the moment while traveling around. If you’re one of those people planning and thinking when you’re gonna be courageous enough to go – take your chances now! Pack your stuff and go – wherever the road takes you. Go to full article: 13 Photos from Photographers on the Road
What are your thoughts on this article? Join the discussion on Facebook or Google+
Article from: PictureCorrect Photography Tips
|
| Wedding Photography Workflow Tips (Video) Posted: 04 Jan 2014 04:06 PM PST Running a successful photography business is a juggling act. There’s so much more to it than simply taking pictures. Without a solid business plan and an efficient workflow, it’s easy for photographers to become overwhelmed. Wedding photographer Vanessa Joy has her wedding photography workflow down to a science. In this master class, she discusses how she runs her business before, during, and after each wedding: Joy’s system is efficient. She incorporates organization, marketing, and quality into each step of her workflow. These are some of her tips for saving time: - Work toward hiring an assistant. There’s just too much work for one person to do alone in a scalable wedding photography business. An assistant can help you during all stages of a wedding by being a second set of eyes and hands to get your work done in the best possible way.
- Create a system for your client meetings. Have a rough script that you use to sell yourself and build credibility.
- Use email templates. You probably spend a lot of time needlessly typing similar messages to different clients. Joy uses a program called TextExpander to create templates for the emails she sends to clients throughout the wedding experience.
- Email your FAQ list to every client. Most wedding clients have the same concerns and curiosities. Save time by keeping the most frequently asked questions and your responses on hand.
- Make a wedding day schedule. If there is no wedding planner, you’re the wedding planner. Get on the same page with your clients so both you and they know what is happening and when and how much time is allotted for photo shoots.
- Get the right gear. Purchase your equipment with intention. Joy has a purpose for everything in her camera bag. She uses a Canon 1D Mark IV camera, a Canon 50mm f/1.2 lens, Canon 85mm f/1.2 lens, Canon 135mm f/2.0 lens, Canon 70-200mm f/2.8 zoom lens, and a Sigma 70mm f/2.8 Macro lens for her ring shots. She also brings along Canon 580EX II flashes, light stands, battery packs, Radio Poppers, a 5-in-1 reflector, and a Dedo Video Light.
- Shoot RAW files and JPEGs. Joy saves RAW files to a Compact Flash card and medium size JPEGs to a SanDisk 16GB card. By saving this way, she has JPEGs to use for same-day surprises like slide shows, and RAW files for her final products.
- Satisfy your clients’ need for instant gratification. When you provide same-day slideshows and albums, you’re marketing to all the potential clients at the wedding as well as getting work done during the reception. This means you’ll have less work to do on Monday.
- Cull in-camera. Though some photographers say that deleting files in-camera can cause issues with file corruption, Joy says she’s never had a problem, and since she uses a two-memory card system, she always has a backup. She instructs her second shooters to cull in-camera, as well. This reduces the time she spends browsing through files to get to the keepers.
- Outsource tasks you hate, tasks that slow you down, and tasks that you’re just not good at. This might be color-correction, album design, or blogging. As long as the work being outsourced isn’t the most important part of your brand, it’s okay for someone else to do it. You can hire people to do your work or you can find relevant online services to streamline your processes.
- Keep a weekly schedule. Set aside particular days for client meetings, engagement sessions, preparing for shoots, designing albums, scheduling social media posts, etc.
- Reassess and tweak your workflow. Joy says her system is always changing for the better. Don’t be afraid to do something differently if it will save you time and keep your business running smoothly.

Knowing your strengths, delegating tasks to others, and striving to satisfy your clients are all parts of a sustainable wedding photography workflow. Vanessa Joy has used her experience to fine tune the way she runs her business. With the right focus, you can get everything done, wow your clients, and still have time to spend with your loved ones. Go to full article: Wedding Photography Workflow Tips (Video)
What are your thoughts on this article? Join the discussion on Facebook or Google+
Article from: PictureCorrect Photography Tips
|
| Rooftop Portraits Using Two Lights (Video) Posted: 04 Jan 2014 11:50 AM PST Taking photographs on a roof is a great way to get a sweeping, dramatic shot. In this video, commercial photographer and lighting expert Jay P. Morgan demonstrates how to use ambient light combined with two strobes for unique portraits: Morgan’s task was to shoot professional portraits of three bank executives at East West Bank in Pasadena. For a compelling background, he took to the bank’s roof for its great views of the city’s downtown. At first, when the sun was higher in the sky, Morgan used one key light to soften the shadows on his subjects’ faces. When the sun began to set, the photographer realized he could add more interest to the background by shooting into the setting sun.  One of the resulting portraits, using ambient light, one key light and one fill light. Capturing a portrait like this on your own is relatively simple. Some guidelines: - Position your subject with their back to the sunset (or sunrise, if you like) and point your camera directly into it.
- Place two strobes with softboxes at angles toward the subject– one on the left, one on the right. (In this shoot, the key light was on the right, the fill light on the left.)
- Experiment with different perspectives– high, low and eye-level.
- For the best representation of your subject, try to keep the background as out of focus as you can. An ND filter can make it possible to use a wide aperture setting without overexposing your shot.
“It’s really important to not just take whatever you’re given, but to make sure you find what you want.” – Jay P. Morgan
Go to full article: Rooftop Portraits Using Two Lights (Video)
What are your thoughts on this article? Join the discussion on Facebook or Google+
Article from: PictureCorrect Photography Tips
|


No comments:
Post a Comment