How to Do Shaped Bokeh Photography in 5 Easy Steps |  |
- How to Do Shaped Bokeh Photography in 5 Easy Steps
- Interesting Photo of the Day: Mystery Dog Accompanies Hiker in Himalayas
- What Does it Take to Be a Celebrity Photographer? (Video)
- How to Use a Sound Trigger to Photograph Kids (Video)
| How to Do Shaped Bokeh Photography in 5 Easy Steps Posted: 03 Feb 2014 06:49 PM PST It’s amazing what you can do with a camera. Light can be captured in different ways, and this opens up many possibilities for the keen photographer. Creating your own shaped bokeh is a fun and exciting way of shaping light as it enters the camera, and it leads to spectacular results. Bokeh refers to the out-of-focus or blurry regions in a photo that occur outside the depth of field. This is especially evident when you have small background highlights that create high contrast.  “Snow Shower” captured by Linda L. (Click image to see more from Linda L.) Taking this concept, you can change the shape of your bokeh by manipulating the lens. You can easily master this cool camera trick by following these five steps:  “Custom bokeh shapes for S5IS” captured by Ginny Le (Click image to see more from Le.)  “Star Bokeh” captured by Deb Buchanan (Click image to see more from Buchanan.)
 “Heart Bokeh” captured by Katelyn “Kate” Wall (Click image to see more from Wall.) With your own custom shaped bokeh, you can make awesome and creative images. This useful and simple photo trick is just about manipulating the aesthetic blur to create something magical in your photos. About the Author: For Further Training on Photo Tricks, PictureCorrect Suggests:Check out Trick Photography and Special Effects by Evan Sharboneau; a very popular instructional eBook that explains how to do most of the trick photos that often capture attention and amazement from viewers. It also teaches the basics that are essential before moving onto advanced techniques. With 300+ pages of information and 9 hours of video tutorials, it is very detailed and includes extensive explanations of many complicated methods that are very fun to learn. It can be found here: Trick Photography and Special Effects 2.0 Go to full article: How to Do Shaped Bokeh Photography in 5 Easy Steps |
| Interesting Photo of the Day: Mystery Dog Accompanies Hiker in Himalayas Posted: 03 Feb 2014 04:26 PM PST Maybe our canine friends enjoy beautiful scenery just as much as we do. In today’s featured photo, a stray dog seems to take in the majestic expanse of snow-dusted Himalayan mountains: 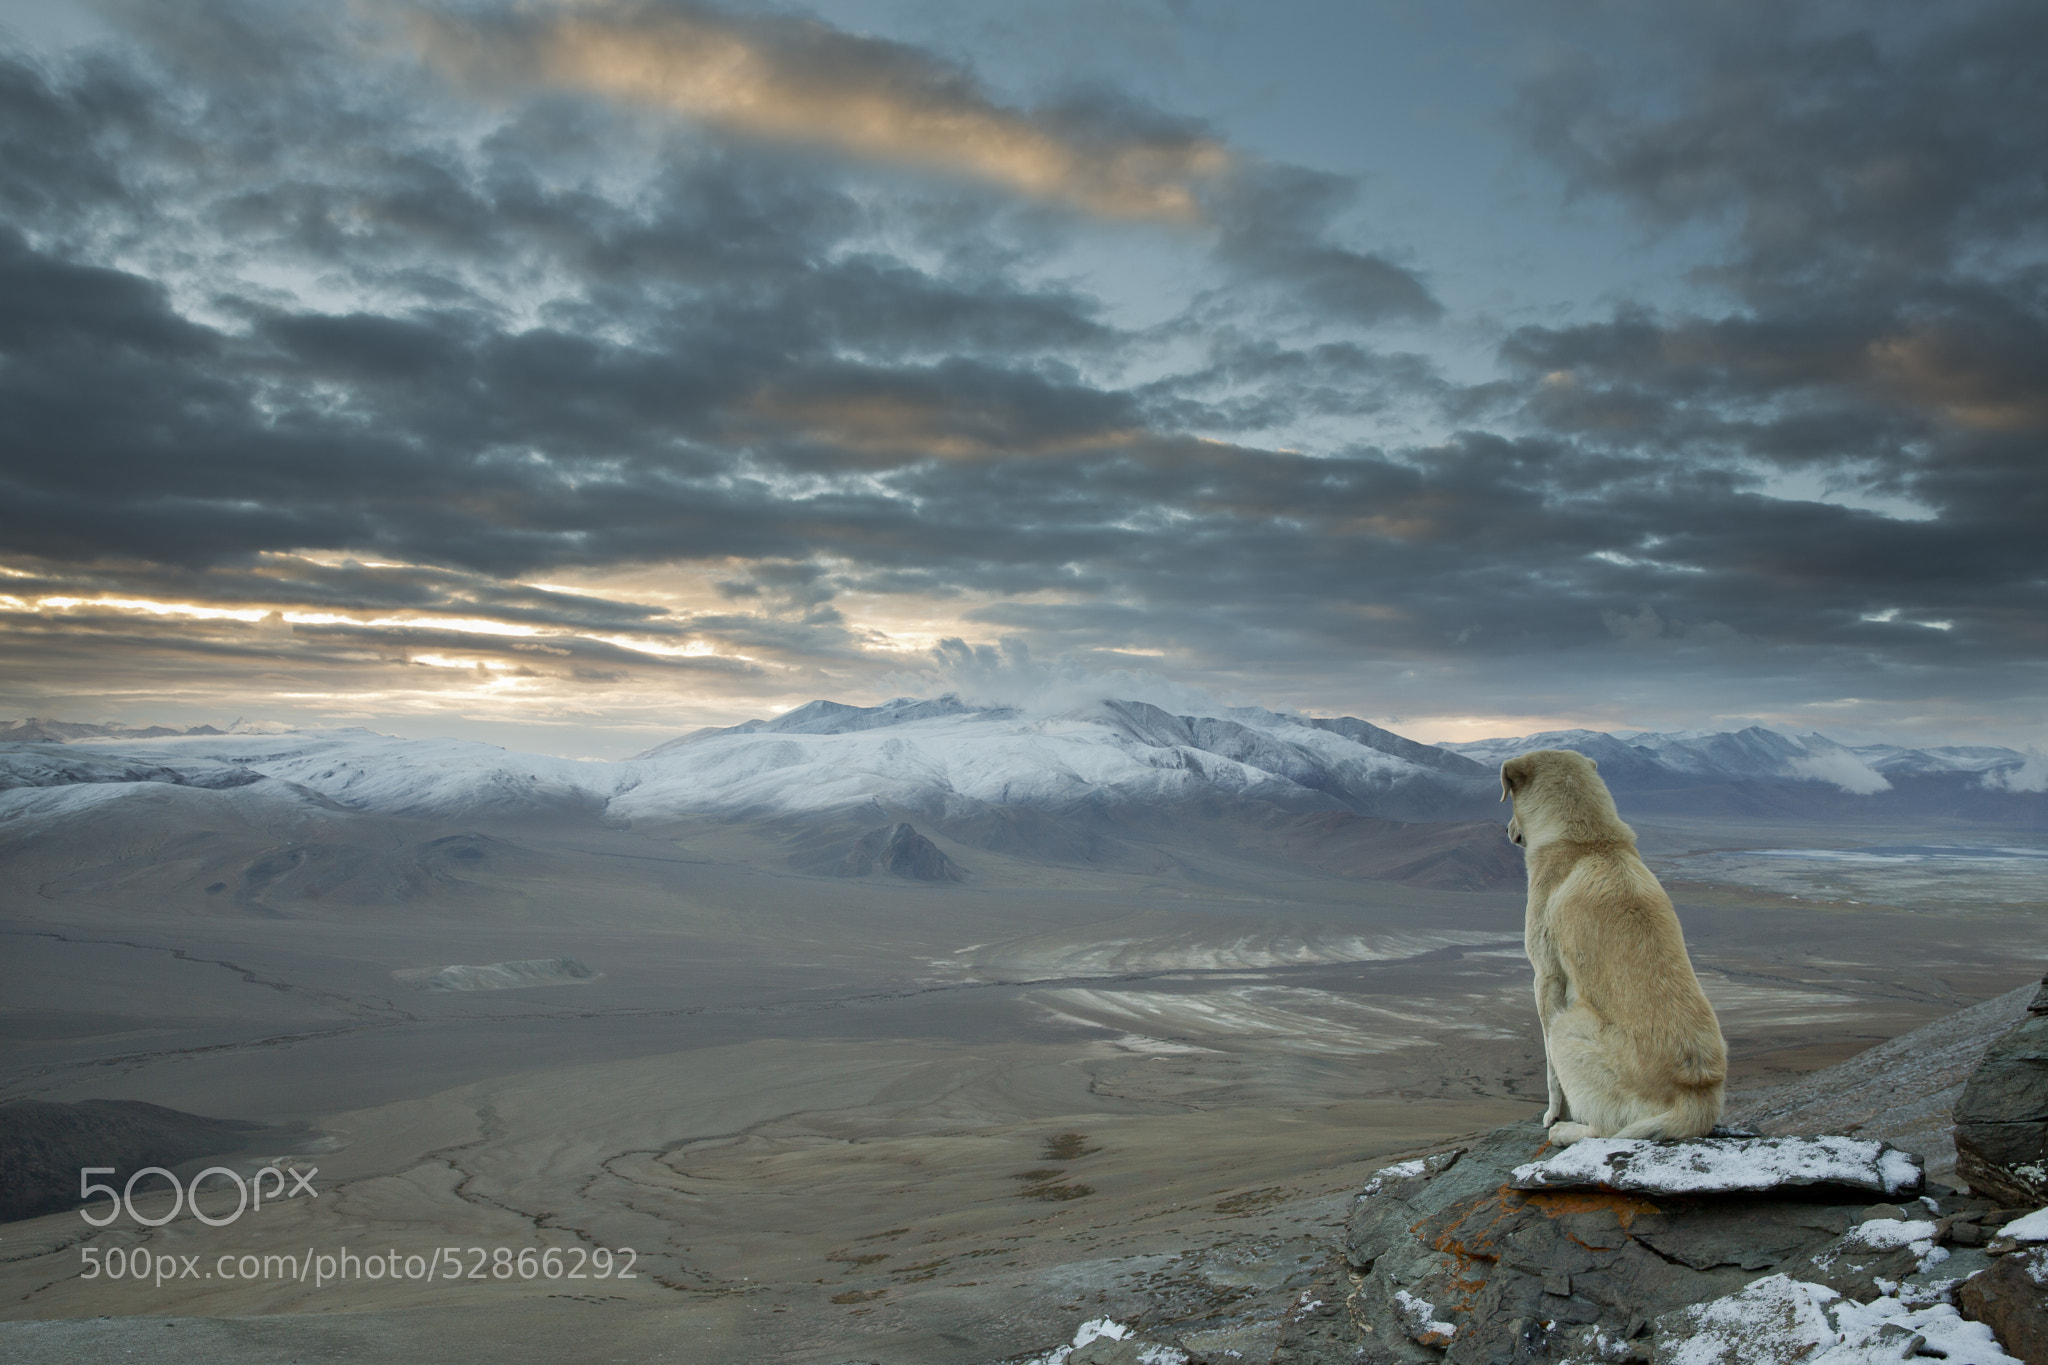 Stray dog joins hiker on Himalayan trek. Photo captured by Sebastian Wahlhuetter. (Via 500px. Click for larger image.) Photographer Sebastian Wahlhuetter captured the shot while hiking in the Himalayan Mountains. He related how the dog was a constant companion to him and his traveling partners over the course of their week-long trek:
Wahlhuetter used a Canon EOS 5D Mark III camera at f/11 and 1/10 of a second. Go to full article: Interesting Photo of the Day: Mystery Dog Accompanies Hiker in Himalayas |
| What Does it Take to Be a Celebrity Photographer? (Video) Posted: 03 Feb 2014 02:28 PM PST There’s no denying that being a full time photographer can sometimes seem like a labor of love. Fortunately for Richard McLaren, his passion for photography has been overflowing since he first got his start at the young age of 16. In the artist profile below, viewers are welcomed into McClaren’s studio, life, and mind as he talks about the road to becoming one of the world’s most renowned celebrity photographers: McLaren’s work has graced the covers of many major magazines, such as GQ, Baazar, Elle, and Cosmopolitan. McLaren credits much of his success to his outgoing nature and the stress-free environment he creates on each set. Making sure the talent he is photographing that session is enjoying themselves helps ensure that their personality comes through in his finished portraits.  Salma Hayek  Jean Claude Van Damme  Pamela Anderson
When shooting an ad campaign for Emirates Airlines, McLaren discovered how fun it could be to incorporate moving portraits into his work, an idea that is beginning to see a rise in the world of photography. For such shoots, McLaren uses the incredibly capable PhaseOne, but cameras such as the Canon 1D C , 5D Mark III, and Nikon’s super compact Nikon 1 V1–all of which offer well suited video modes–put capturing pro-quality moving images within the realms and budgetary restrictions of hobbyists and serious enthusiasts alike. Go to full article: What Does it Take to Be a Celebrity Photographer? (Video) |
| How to Use a Sound Trigger to Photograph Kids (Video) Posted: 03 Feb 2014 10:37 AM PST Photographers know that the two hardest living things to capture good pictures of are children and animals. Because they’re constantly active and moving, it can be quite a challenge to keep young children stationary long enough to focus your lens and snap a picture before they’re off and running toward the next shiny object they see. Inventor James Madelin created the ioShutter to combine the iPhone and a DSLR to create incredible time-lapse, stop-action, or single frame photos using your iPhone as the trigger. As an added bonus, Madelin created a feature in the ioShutter app that allows you to trigger the shutter through sound or movement. So, how does this invention make it easier to photograph kids? In this video, Madelin shows us how the ioShutter allows children to essentially take their own photos: How to Set Up a Simple Studio to Photograph KidsMadelin says it’s very easy to set up an impromptu, portable studio for a reasonable cost. For this shoot, Madelin simply found a white hallway which bounces and softens the light from the Speedlights, creating professional-looking images. He set up two Speedlights on nano stands–one to the left of his camera, facing the white wall, and the other behind his white backdrop. Madelin divulges another secret to save money on this studio set; he suggests using a white sheet clipped to a backdrop frame rather than spending a great deal of money on an expensive, heavy cloth background.
To get amazing photos of his kids, the most important part of this setup is one of the smallest pieces–the ioShutter connecting Madelin’s camera to his iPhone.
The free ioShutter app allows Madelin to set the shutter settings from his phone. Here, he has it set so there is a short delay from whenever the app recognizes his kids shouting, clapping, or screaming, to when the shutter snaps. This gives the kids a chance to close their mouths and smile before the photo is taken.
The interaction with the camera app allows kids to be involved in the picture-taking process, making it more fun and engaging than simply posing for a photographer. The results are pictures that truly show kids having a great time–a product every parent would be overjoyed to display and share. Go to full article: How to Use a Sound Trigger to Photograph Kids (Video) |


| You are subscribed to email updates from PictureCorrect Photography Tips To stop receiving these emails, you may unsubscribe now. | Email delivery powered by Google |
| Google Inc., 20 West Kinzie, Chicago IL USA 60610 | |
No comments:
Post a Comment