10 Tips to Improve Your Black & White Photography |  |
- 10 Tips to Improve Your Black & White Photography
- Timelapse: Massive Antennas Show Us Stars Being Born (Video)
- The Basics of Reading and Harnessing Light for Photography (Video)
- Interesting Photo of the Day: Rare View of the World’s Largest Cave
- How to Remove Color Casts in Photoshop (Video)
| 10 Tips to Improve Your Black & White Photography Posted: 15 Apr 2014 06:52 PM PDT In a world of color, sometimes you just can’t beat a strong black and white image. Black and white photography can be an amazing tool to conveying a mood, story, or statement to your viewers. While a color portrait can tell a story too, the absence of color in black and white imagery often presents a much stronger impact. Here are a few tips for creating strong black and white photographs: 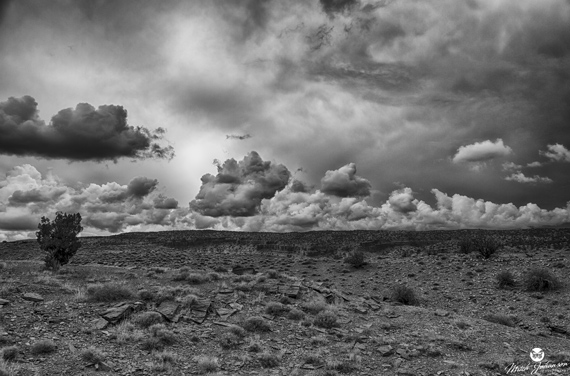 “3 D Sunset BW” captured by Mitch Johanson (Click image to see more from Johanson.) 1. Subject MatterThe first thing to consider is your subject matter. Would it be strengthened by the absence of color? The truth is, not every image will look better in black and white. Sometimes color is needed to distinguish your subject from the other elements in the image. So really evaluate whether or not your chosen image will benefit from a black and white conversion. 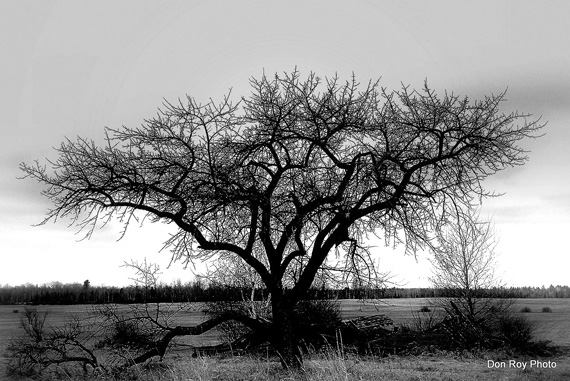 “Bruces Crossing, Mich. 2010″ captured by Don Roy (Click image to see more from Roy.) 2. Shape and FormAs previously stated, sometimes color is needed in an image to separate, distinguish, and add interest. When you shift an image to black and white, you can no longer rely on color to add interest or a focal point to your photograph. That’s why form and shape are incredibly important in black and white photography. You’ll have to look beyond colors and instead focus your attention on shapes and lines, arranging them in a way that emphasizes the most interesting aspect of the shape or that creates an intriguing composition of different shapes. 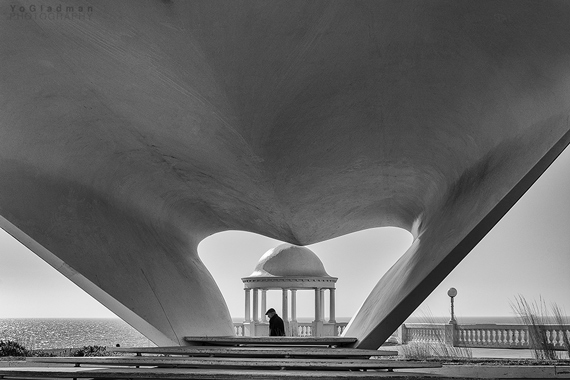 “Gotcha” captured by Yo Gladman (Click image to see more from Gladman.) 3. PatternIn color photos, patterns often go unnoticed because the colors draw all the attention away from them. However, black and white photographs give you a much better chance of capturing interesting patterns; the distraction of color is no longer present, giving subtle patterns the chance to take shape and emerge. 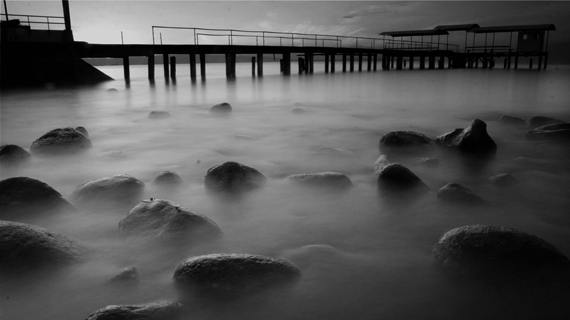 “Pattern” captured by Roland L. Jumawan (Click image to see more from Jumawan.) 4. TextureTexture is a crucial element in black and white imagery. Textures provide us with tonal contrast and relay depth to the viewer. Without textures, you would simply have a smooth flat surface showing some shade of gray, but with texture we have something interesting and inciting to view. Try combining a variety of textures, like a glossy pen next to a textured sheet of paper sitting on a dirty desk. The right textures combined together will help to add interest and appeal to your photograph. 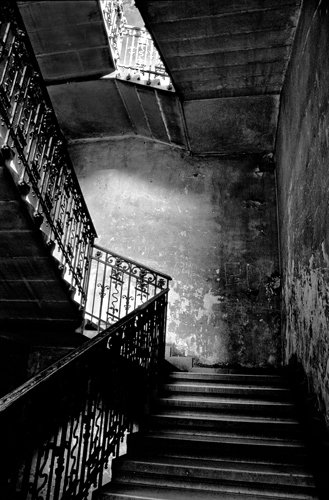 “Towards the Light” captured by Levente Toth (Click image to see more from Toth.) 5. Composition A strong composition is even more important in black and white photography than in color imagery. Remember composition elements such as the golden ratio and leading lines when composing your image. These elements help pull viewers in and keep their interest in the absence of color. 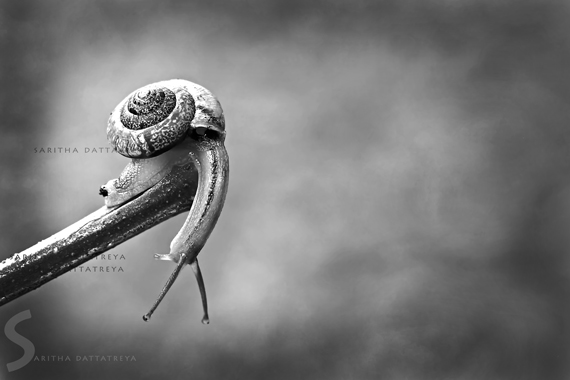 “Top of the World” captured by Saritha Saritha (Click image to see more from Saritha.) 6. Lighting, Lighting, LightingThis, of course, is of vital importance in black and white photography. In black and white photographs, proper lighting can make or break an image. Good lighting can help increase the contrast within your image, providing more interest to your portrait–or it can be used to create drama, mystery, and moody contrasts within the image. 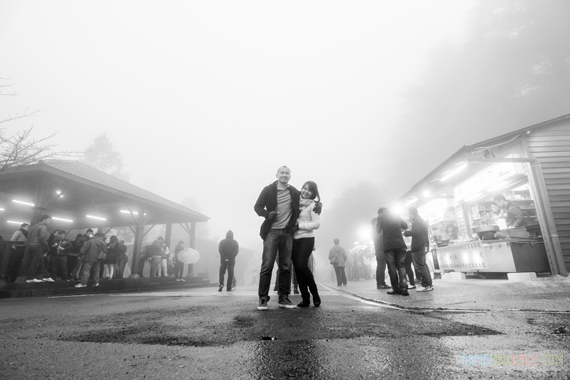 “Foggy Morning” captured by Bambi Corro III (Click image to see more from Corro.) 7. Slightly Overexpose This is more of a personal suggestion. But I always slightly overexpose when I shoot. It helps bring all the tones up a little so you don’t lose any details in the dark shadows. Of course, you don’t want to over-do it and blow out your whites, but a slightly overexposed image can be tweaked more easily to suit your needs. 8. Avoid NoiseSometimes grain adds to an image, but always be intentional about your use of it. Many people will shift a poorly created image to black and white to hide the noise in their image that results from poor setting choices. If you are intentionally shooting to create a black and white images, be very conscious of your settings; choose them wisely. Most of the strongest and most well known black and white images are crisp and sharp. So don’t let your ISO get too high. 9. Shoot in ColorMany cameras have the option to shoot in black and white. Even if you know you’re going to be converting your images to black and white, always shoot them in color first! When your camera internally converts your color image to black and white all kinds of detail and information is lost in the conversion. Rather than risk a sub-par creation, shoot your image in color and convert it to black and white on your computer, where you will have much more control of the finished product. 10. ContrastWhen converting your photograph to black and white, pump up your contrast. Whether you use an action, level layer, or curves in your conversion, your black and white photograph can handle a lot more contrast than a color image. Make your blacks a deeper black and your whites a brighter white. You can always pull up the histogram in Photoshop to check your levels; you will want a healthy looking mountain in your histogram to have a strong image. 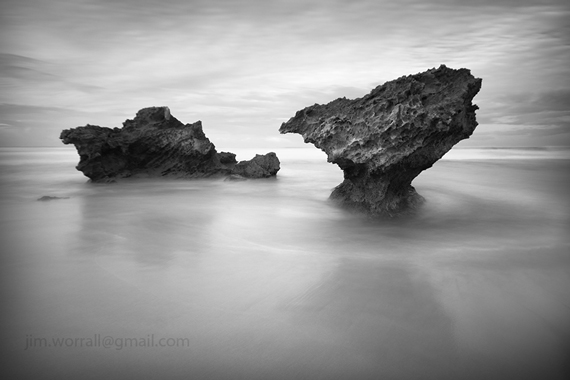 “A Montfort Morn” captured by Jim Worrall (Click image to see more from Worrall.) About the Author: Go to full article: 10 Tips to Improve Your Black & White Photography |
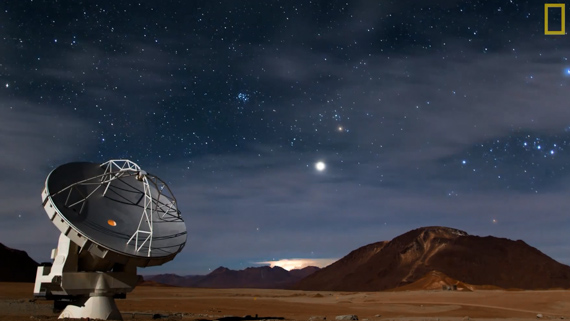
| Timelapse: Massive Antennas Show Us Stars Being Born (Video) Posted: 15 Apr 2014 03:41 PM PDT Imagine being able to witness stars being born from the comforts of Earth. Thanks to 20 years of research, over a billion dollars worth of investments, and countless hours of hard work, ALMA–or, Atacama Large Millimeter/Submillimeter Array, we are poised to be able to do just that. Set on the very remote peak of Cerro Chajnantor in the Atacama region of South America, the grouping of ultra powerful telescopes are providing us with images of distances into space we once could only daydream about. Take a look at a timelapse of ALMA at work via National Geographic:
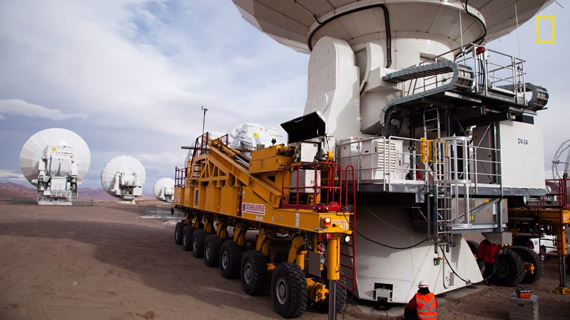 One of the giant antennas being trucked in on a massive 28-wheeled vehicle.
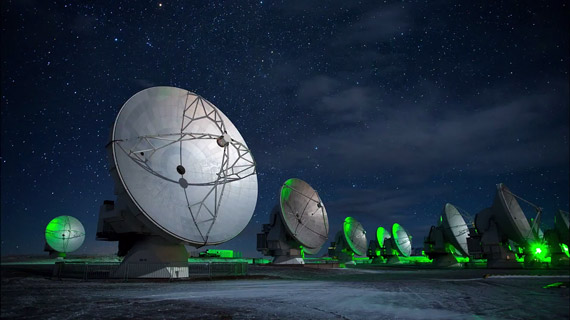 Dozens of giant dishes form the Atacama Large Millimeter Array, which is able to look “deep into the early universe.” An international collective consisting of Europe, Japan, and the US is responsible for the work ALMA is doing and, though its official launch was just a year ago at the time of writing, the images that are being made have already given astronomers and scientists new information to study. Even with only 16 antennas in working order, the scientists have been able to view new stars being formed in over 26 galaxies that averaged over 11.7 billion light-years away. Go to full article: Timelapse: Massive Antennas Show Us Stars Being Born (Video) |
| The Basics of Reading and Harnessing Light for Photography (Video) Posted: 15 Apr 2014 02:04 PM PDT Some photographers specialize in “natural light” photography and others have mastered the artificial “creative” stuff, but photographer Joe McNally does it all, and well indeed. In the following short video tutorial, McNally provides basic advice about how to read and harness available light and then integrate that natural ambient light with artificial light: McNally begins the first look of his photo shoot with three-time US Olympic fencer Sharon Monplaisir using only the natural, ambient light streaming into the bright warehouse chosen for the photo session. He strategically places Monplaisir in the corner of the room to benefit from the light reflecting off of the warehouse’s walls on both sides of her face and behind her. Softly lit from all angles, McNally’s natural light photograph turns out like this: 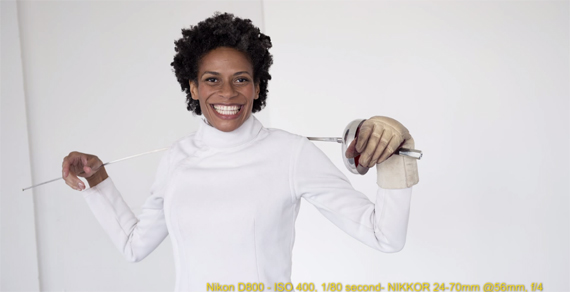 Natural light provides a soft and pleasing fill while still maintaining some defining shadows. However, while that soft ambient lighting partnered nicely with Monplaisir’s bright expression, it wouldn’t match the fierce game face of a three-time Olympic athlete, and so for Monplaisir’s edgier poses, McNally creates edgier lighting with a Nikon SB-910 Speedlight and his Nikon 24-70mm f/2.8 lens zoomed all the way out to 24mm.
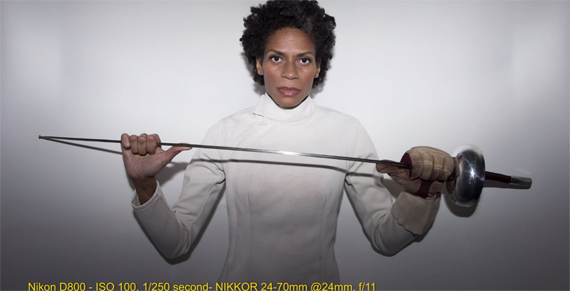 Setting the flash contrary to the “norm” allows for a more dramatic effect. Next, McNally moves Monplaisir to stand in front of the window to demonstrate the differences between solely using natural window light and mimicking the behavior of the window light using a speedlight. The natural light from the window is beautiful and soft, but it can only effectively light one side of Monplaisir’s face, casting the other half of her face into shadow. Rather than lose the textured background by increasing the overall exposure of the image, McNally opts for a fill flash, bouncing the light off a nearby wall to create even light all over Monplaisir’s face. 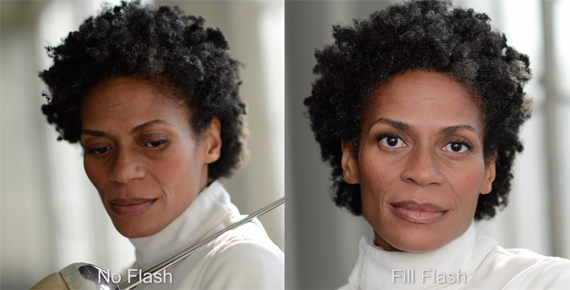 The image without flash is pleasing but nowhere near as flattering as the photo with flash.
Joe McNally has been a professional photographer for over 30 years and has been an ongoing contributor for National Geographic for 23 years running, in addition to contributing numerous images to esteemed publications such as LIFE, Sports Illustrated, TIME, and others. Go to full article: The Basics of Reading and Harnessing Light for Photography (Video) |
| Interesting Photo of the Day: Rare View of the World’s Largest Cave Posted: 15 Apr 2014 12:15 PM PDT Recently opened to the public (that is, to individuals who can pay $3,000 plus a flight to Vietnam for a guided adventure tour), Hang Son Doong cave is the largest cave in the world. Guarded by the lush and treacherous jungle of Vietnam’s Phong Nha-Ke Bang National Park near the Laos border, the cave was first discovered in 1991 by a local man named Ho Khanh; it was later rediscovered by British explorers in 2009. This rare view of the cave, taken by photographer Carsten Peter, was published with National Geographic’s 2011 article about the cavern:  Photo by Carsten Peter. (Via Imgur. Click to see larger size.) As the meaning of its name (“mountain river cave”) suggests, Son Doong features a raging subterranean river called the Rao Thuong. The cave is a mammoth, stretching for more than 2.5 miles with continuous passages as wide as 300 feet and over 600 feet tall—that’s room enough for 747 planes and skyscrapers, respectively.
Go to full article: Interesting Photo of the Day: Rare View of the World’s Largest Cave |
| How to Remove Color Casts in Photoshop (Video) Posted: 15 Apr 2014 10:45 AM PDT If you’re shooting with soft lighting and a colorful backdrop, it’s all too common to find a bit of color affecting the subject—green backgrounds make them look sickly, orange makes them glow, stuff like that. In this tutorial, Michael Woloszynowicz shows off a handy little tip that avoids Photoshop‘s messy trial-and-error color balance correction: As he points out, the original image is simply too orange. The subject looks like she just came from a tanning salon:
To offset this, sample the skin color from a highlighted part of the face. Hit alt + command + delete to fill the image with a mask of that color. Then click the layer filter and change it to color, so it looks something like this:
Now the trick: inverse it. Hit command + control + I to inverse the colors, so that you can offset the balance of the predominant color. Lower the opacity to something under 10 percent so it looks subtle.  If this is your result, you probably want to lower the opacity to make the blue less noticeable. Lastly, Michael recommends creating two such layers—isolating one for highlights and one for shadows; their color differences are subtle, but the result will be cleaner. To do this, double click the layer, and where it says Underlying layer at the bottom, grab the shadow slider, click alt to split it in two and clip out the dark mid-points. Then repeat the entire process again, but this time use the eyedropper on a shadowed skin tone and split the Underlying layer slider down from the highlights so it only affects the shadows. The result will look something like this:
For comparison, the original image:
As you can see, the final product is less overly vibrant but much more realistic given her actual skin color. It’s a subtle change, but it makes the difference between pro and amateur digital editors. While Photoshop is often used as a tool to enhance reality and create unrealistic beauty standards, pro photographers would do well to keep it in check and do the opposite sometimes—use it to control the unrealism that digital cameras capture on their own. Go to full article: How to Remove Color Casts in Photoshop (Video) |


| You are subscribed to email updates from PictureCorrect Photography Tips To stop receiving these emails, you may unsubscribe now. | Email delivery powered by Google |
| Google Inc., 20 West Kinzie, Chicago IL USA 60610 | |
No comments:
Post a Comment