5 No-Nonsense Ways to Keep Your Photos Sharp |  |
- 5 No-Nonsense Ways to Keep Your Photos Sharp
- How to Succeed as a National Geographic Photographer (Video)
- Interesting Photo of the Day: A Real-Life Garden of Eden
- 7 Steps for Photographing Wedding Reception Details (Video)
- Amazing New Technology Turns Your Photos Into Music (Video)
| 5 No-Nonsense Ways to Keep Your Photos Sharp Posted: 02 Apr 2014 01:33 AM PDT Modern DSLR cameras can produce very sharp images with plenty of detail. However, the chief limiting factor to the sharpness of an image is the quality of the lens being employed. If you use a basic kit lens, you will not obtain the best image possible with your camera, simply because the elements comprising the lens are imperfect. Yet even if your lens is the best there is (and that does not mean the most expensive) there are other factors that can ruin the sharpness of your images. Only if you can control these factors and use your best lens will you get that perfectly sharp image that you are looking for. So, here are five things to do to ensure maximum sharpness in your images:  “Reflected Beauty” captured by Ævar Guðmundsson (Click image to see more from Guðmundsson.) 1. Use a Tripod at All TimesA general rule is that if you shoot at shutter speeds of less than 1/30 of a second, you should be using a tripod or some other form of stable camera mount, such as a bean bag. This is a good rule, but be aware that even at faster shutter speeds, a tripod will always increase image sharpness. This is because even the slightest bit of motion impacts the sharpness of the image. If you find that it is impossible to use a tripod in a certain situation then by all means use a bean bag or look for the next best thing to give stability to your camera, such as a wall or fence. As long as it takes the weight of the camera off your hands, any support will do. 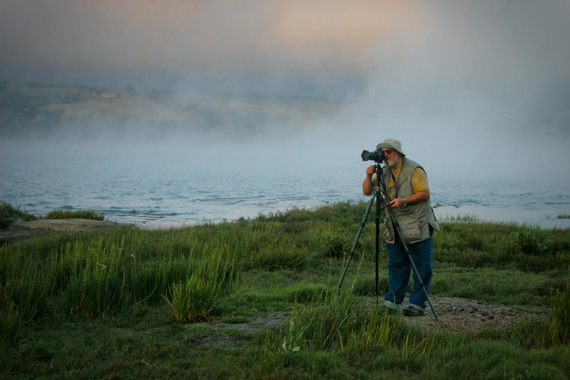 “Tripod at Dusk” captured by Orin Zebest 2. Use Your Camera’s Self-Timer or a Remote ControlEven if you are using a tripod, in order to maximize image sharpness you ought to consider using either the camera’s built-in self-timer, or a remote control. You can even use both together. These will stop your shaky hands moving the camera as you take the shot. 3. Use Image Stabilization when Hand-Holding the CameraDo not use image stabilization if you are using a tripod! This technology attempts to compensate for hand movement, so if it is not there it will still try to compensate and thus blur the image. Only use image stabilization in your lenses or camera body when hand-holding the camera. Image stabilization technology is only good up to a point, but don’t bother with it if you need an extremely sharp images. For that, use a tripod. 4. Use Mid-Range Aperture SettingsTry not to shoot at the extreme end of your camera’s range if you want to acquire ultra-sharp images. Stopping a lens down all the way will produce lens diffraction, which will blur the image. Likewise, by setting the aperture to its minimum size, the image sharpness will suffer due to aberration and other effects. For maximum image quality shoot at middle aperture settings two or three stops below maximum aperture, like f/8 to f/11.  “Portland Head Light, ME” captured at f/8 by Dave Sosnowski. 5. Use Mirror Lock-UpIf your camera has the ability to lock the mirror, then you should use that setting at all times, especially when shooting long exposures. Every time the mirror flips up and down it introduces small extra vibrations. Locking the mirror when you shoot will prevent this, and consequently, image sharpness will improve. About the Author: Go to full article: 5 No-Nonsense Ways to Keep Your Photos Sharp |
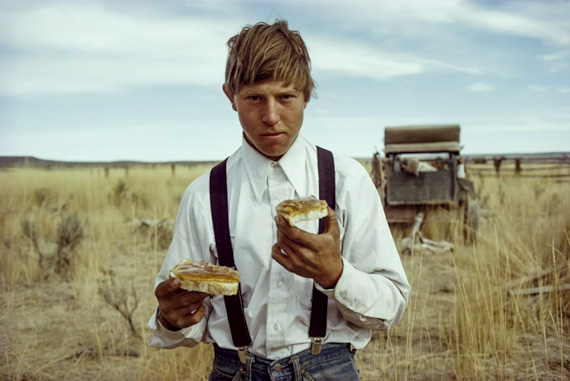
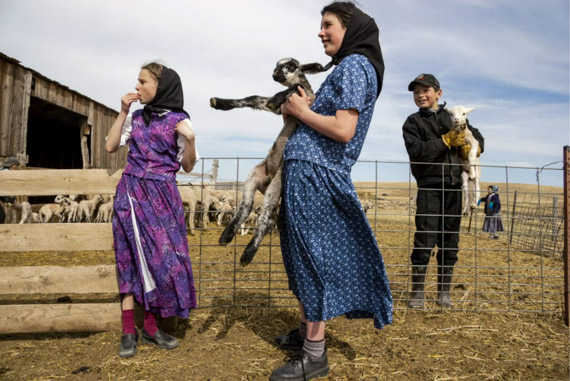
| How to Succeed as a National Geographic Photographer (Video) Posted: 01 Apr 2014 03:18 PM PDT Being a National Geographic photographer sounds like a dream job for many aspiring photographers, but as William Albert Allard explains in the insightful clip below, it isn’t all fun and glory. Allard has worked on dozens of stories for National Geographic, assuming many different roles, including staff photographer and writer. Take a look at what he has to say about landing the “dream job”: Allard credits his success—not just as a photographer for National Geographic, but as a photographer in general—to his drive and passion to be part of the action. He never considers himself an outsider looking in; rather, he makes a valid effort to become part of the action, immersing himself in the storyline to gain an insider’s perspective.
Go to full article: How to Succeed as a National Geographic Photographer (Video) |
| Interesting Photo of the Day: A Real-Life Garden of Eden Posted: 01 Apr 2014 02:10 PM PDT On a quiet patch of Californian coast sits El Capitán State Beach, home to soft yellow sand, unpredictable tidepools, and dense sycamore and oak forests. It’s heralded as a paragon of surfing, camping, and fishing. But it’s less appreciated for how photogenic it is—and how much it can spring to mind a real-world Garden of Eden:  We won’t guess how long the photographer waited for the sun to hit that perfect spot. (Via 500px. Click for larger image.) The photographer is Marc Adamus, who strives for sharp colors and wide, natural landscapes. Aside from expert composition and shallow compression, what really brings out the beauty in this image is the way the sun highlights the foreground flowers, giving them a unique texture that only “magic hour” lighting can provide. Go to full article: Interesting Photo of the Day: A Real-Life Garden of Eden |
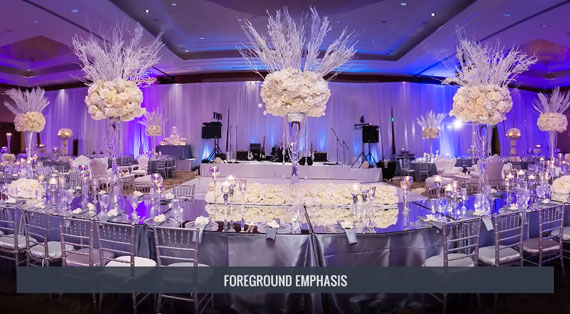
| 7 Steps for Photographing Wedding Reception Details (Video) Posted: 01 Apr 2014 12:07 PM PDT Receptions can be the most overwhelming part of a wedding–especially for photographers. The DJ is sound-checking, managers are running around keeping staff in check, and the staff themselves are sweating trying to perfect the tables up to the last minute. To take great photos, you need to act quickly and kindly, not to mention finding great shots. In this video, Michelle Ford doles out seven essential shots not to missed when shooting receptions: 1. Shoot the full room firstWork with whoever is in charge to empty the room of busybodies as quickly as possible. There are generally two types of shots: perfect symmetry or an emphasized foreground, using a prominent object like the cake or a centerpiece as an anchor. Always use a tripod, use a low ISO, and set your shutter speed to several seconds so any people still moving around can be blurred out.
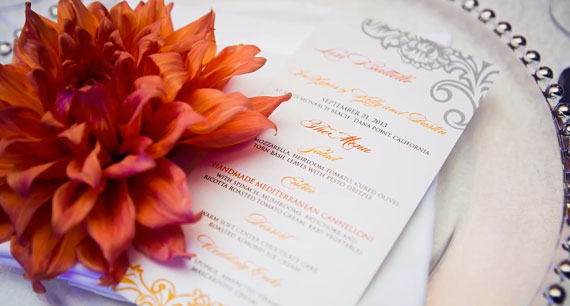
2. Start with the detailsAlways start small, with details like place cards. Not only do you get the shot before people have sat down and removed their cards, but this also gives you time to figure out the room’s lighting. 3. Move up to menusYou always want to stay one step ahead of the guests. If the first thing they grab will be the place cards, next will be the menus. Shoot them as tight as you need if people are sitting at the tables already, and get one or two great shots before moving onto the bigger pictures.
4. Next up: Place settingsShoot the little objects on the plates before trying to capture the full image. Don’t be afraid to fiddle with the table if you put things back when you’re finished–feel free to remove whatever distractions you see fit, like salt and pepper shakers. 5. Get the Big Picture: Full reception tablesWhenever possible, look for depth. By now you should be finished with your details—you want to get wider angles that capture more of the room itself in all its complexity. Using shallow depth of field and tight compression can yield really nice results. (Michelle suggests only shooting with strong compression lenses, like anything higher than 85mm.)
6. The sweetheart tableThere isn’t always one, but if there is, the same rules apply–start small, then work your way out to the full picture. The sweetheart table should be a portrait of intimacy, so, again, you should feel comfortable getting in close and keeping shots tight.
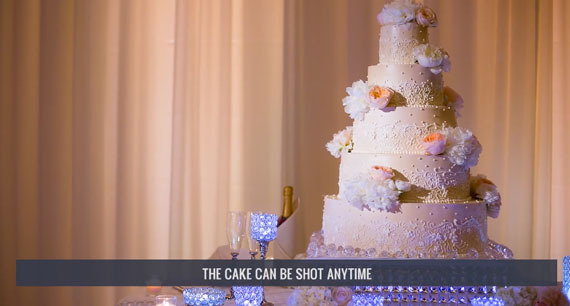
7. Leave the cake for dessertBecause the guests enjoy the cake last, and it’s usually off in a corner somewhere by itself, there’s no need to rush toward it. Unlike everything else, it will very likely be in the same condition after the guests have begun filing in, so you can afford to shoot it last, after things have begun to settle down.
A mental checklist for photographing a wedding reception will keep you from becoming overwhelmed and missing essential shots in the chaos. And the happy couple will love having pictures of all the special details that they planned so carefully. Go to full article: 7 Steps for Photographing Wedding Reception Details (Video) |
| Amazing New Technology Turns Your Photos Into Music (Video) Posted: 01 Apr 2014 10:33 AM PDT Have you ever looked at a photo and wondered what it might sound like if you could somehow convert the digital image file into a music file? Someone did. And I guess they assumed that at least one other person in the world did, too. And then they made this video:
In a brilliantly spot-on genre satire of TED Talks, this fake entrepreneur from The Onion introduces PicSong, an app that ostensibly analyzes colors, shapes, and file types, and somehow distills them into music notes that invariably sound like ridiculous garbage. As if to prove why this absurd technology could ever be useful, the convincing speaker pulls out a smartphone, takes a shot of the crowd and turns it into something that sounds like the alien language in Close Encounters of the Third Kind.
Go to full article: Amazing New Technology Turns Your Photos Into Music (Video) |


| You are subscribed to email updates from PictureCorrect Photography Tips To stop receiving these emails, you may unsubscribe now. | Email delivery powered by Google |
| Google Inc., 20 West Kinzie, Chicago IL USA 60610 | |
No comments:
Post a Comment