How To Use An Accent Light In Your Portrait Photography |  |
- How To Use An Accent Light In Your Portrait Photography
- What Can a Building Teach You About Photography? (Video)
- GoPro Lets You Be Superman For A Day (Video)
- Interesting Photo of the Day: Sunset Refraction
- How to Remove a Bra… in Photoshop, Of Course (Video)
| How To Use An Accent Light In Your Portrait Photography Posted: 05 Apr 2014 01:13 AM PDT In the past few portrait photography photo tips articles, we’ve been discussing how to light a portrait. So far, we’ve covered how and when to use four different lights. The basic three light set and the first specialty light, the “hair light”. Today’s portrait photography photo tip will end our discussion of lighting with the last specialty light, the accent light. While I’m referring to today’s specialty light as an “accent light,” we most often use it to put a catchlight in the eyes–so you will often hear it referred to as an “eye light”. At times, it is also called a “kick light”. 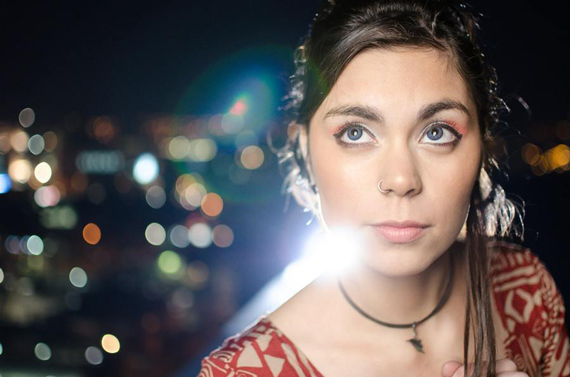 “Ada” captured by Daniel Riquelme By the way, you are not limited to just one. You could have an accent light for the eyes and others accenting anything you want. If for some, unknown reason you want to accent these things, you could have an accent for jewelry, fingernails, or even a certain point in the backdrop. Anything you want to drive the viewer’s eye toward. It’s like a mini spotlight. So while I say there are five types of lights, I’m referring to categories, not the number of lights being used. Your set could literally have dozens of accents. (Technically, the hair light is an accent, but we use it so often that it deserves its own category.) Keep in mind that the basic three light set will handle most of your needs. You should only add additional accents if you really need them. Every time you add an extra light, you increase the technical difficulty and the chances that it will mess up your photo. In other words, just because you have extra lights, doesn’t mean you need to add them. Today’s Portrait Photography Photo Tip: Use an Eye LightSometimes you will have a pattern that makes it difficult to put a catchlight in both eyes. An example of this would be the split lighting pattern. One side of the face is bright, and the other side is in shadow. If we want a deep shadow, we may opt not to use a fill flash, so there is no catchlight hitting the shadowed eye. Or, you may have a subject with a large nose that blocks the light or exceptionally deep set eyes that don’t let in a catchlight. Catchlights are vital! You must have them. Without a catchlight in both eyes, the eyes look dead and lifeless, and your viewers (and subjects) will NOT like the portraits. 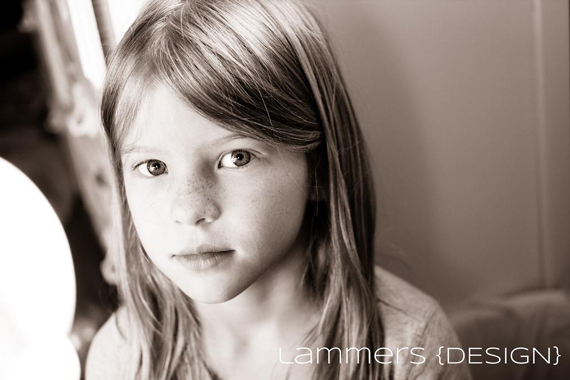 “Catchlights” captured by Jaimi Lammers The fix? Add an eye light. This is nothing more than a little light that is aimed at the eyes –or whatever you are trying to accent– and is blocked as much as possible from hitting anything else. Here is where using a snoot will come in handy. A snoot is a photo gadget that you slip over a light. It looks like a cone and it narrows the beam of light so it only hits whatever area you are trying to accent. In the case of the eye light, you would focus the beam on the face in the area of the eyes. Caution: it is virtually impossible to have an eye light that is only lighting the eyes. It will illuminate at least some of the face and, in effect, could increase the exposure value. Be careful that you don’t set it to be too bright. Another problem with setting the eye light too bright is that it could introduce another set of shadows on the face. This is a no-no. The only shadows we want should be from the key light. The good news is that since the eyes are a mirrored surface, the eye light doesn’t need much strength. It can be very weak and still do the job. Another caution is to make sure you only have one catchlight in each eye. We are trying to make the eyes look bright, intelligent, and natural; multiple catch lights don’t look natural. Set up your accents in such a way that there is only one catchlight. If you can’t do this, you will need to go into Photoshop and remove the extras. (They should be round, too!) Practice adding accent lights–particularly eye lights. The results are worth it. Today’s portrait photography photo tip–use an accent light–ends our discussion of lighting. If you’ve read all the previous lighting articles–and practiced them–you know more about portrait photography lighting than 90% of all the photographers out there. Including professionals! About the Author: Go to full article: How To Use An Accent Light In Your Portrait Photography |
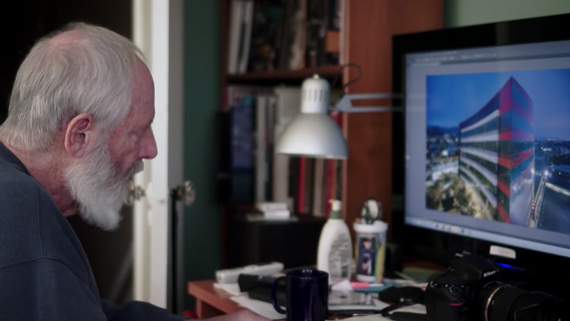
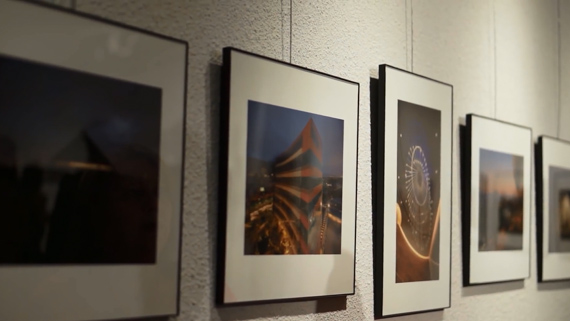
| What Can a Building Teach You About Photography? (Video) Posted: 04 Apr 2014 02:55 PM PDT Listening to Andy Romanoff talk about his approach to photography in the following video can give photographers some helpful insight. As he outlines in the profile, he has always taken a different path when it comes to photographing people, objects, and places. He has learned to create art out of what others might consider mundane. Listen to his inspiring words: As Romanoff so eloquently says in the video, it is possible to see the same thing in very different ways by studying it at different times throughout the day and night. Being aware of the ways that things change as the light moves around them helps to create distinct images. Romanoff spent six months photographing the same building–the Pacific Design Center in West Hollywood. The exercise produced a gallery of unique images that prove that observation of changes in light and perspective are crucial to creative photographers.
Go to full article: What Can a Building Teach You About Photography? (Video) |
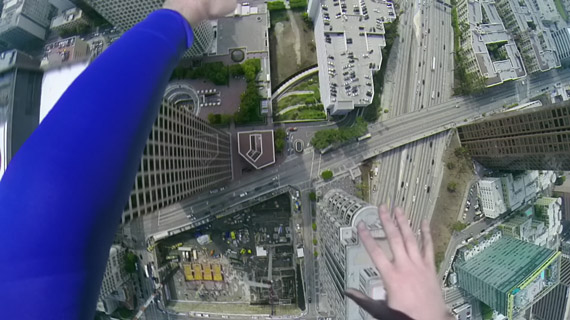
| GoPro Lets You Be Superman For A Day (Video) Posted: 04 Apr 2014 01:28 PM PDT GoPro, the small and powerful action camera, has taken the world of photography by storm. The affordable camera allows photographers to take great quality images and video on the go. As more and more people start using the tiny device, we begin to see more and more creative media hitting the internet. For example, the video clip below shows what the team behind Corridor Digital was able to do with their GoPro and a Phantom II drone: The drone allowed the crew to take aerial footage from across Los Angeles without the expense of using an actual helicopter. They just mounted a GoPro onto the quadcopter and flew the camera above the city. With the help of a video transmitter on the Phantom drone, a live feed of the GoPro footage was sent to a monitor on the ground to help the photographers compose the shots.
(Via PetaPixel) The rest of the magic, such as making Superman’s arms appear in the frames, was done in post production—along with speeding up some of the footage and splicing sequences of shots together. Want to make a Superman video of your own? Take a look at the behind-the-scenes footage to see how the team was able to create the creative clip: Technology is proving once again that the possibilities are endless. What was initially created to be an accessible sports and action camera has become a staple in many photographers’ gear bags. Go to full article: GoPro Lets You Be Superman For A Day (Video) |
| Interesting Photo of the Day: Sunset Refraction Posted: 04 Apr 2014 12:03 PM PDT Digitally manipulated images get a lot of heat across the internet, but does that mean they are any less artistic or awesome? In the case of the photo below, which was created with an app called PIP Camera, the image is still a creative piece of art that has inspired other photographers to try their hand at creating similar images in-camera:  While this image is digitally manipulated, it doesn’t make it any less interesting to look at. (Via Imgur) Most will be able to see the obvious edits made to this photograph, but at first glance and critical eyes aside, the image is rather captivating. Go to full article: Interesting Photo of the Day: Sunset Refraction |
| How to Remove a Bra… in Photoshop, Of Course (Video) Posted: 04 Apr 2014 10:27 AM PDT It takes a tremendous amount of time and patience to nail every aspect of a photo shoot at once—sometimes you’ll catch the smile but the lighting will be off, or the lighting is great but the framing is wrong. If you’re lucky, everything will turn out perfectly—but you’ll have missed a few details, like a sneaky bra strap poking out of the shirt. The video comes from the fine people at Phlearn and takes a quick and witty approach to solving the problem using Photoshop:
It’s easy: all you to is use the spot-healing brush, click “content-aware” at the top, and run the cursor over the object you want to erase. This will replace the object in question with its surrounding textures, like so:
Definitely a useful tip for starting photographers, and a good reason not to let little details ruin your shots. Go to full article: How to Remove a Bra… in Photoshop, Of Course (Video) |

| You are subscribed to email updates from PictureCorrect Photography Tips To stop receiving these emails, you may unsubscribe now. | Email delivery powered by Google |
| Google Inc., 20 West Kinzie, Chicago IL USA 60610 | |
No comments:
Post a Comment