How to Apply the Golden Ratio to Photography |  |
- How to Apply the Golden Ratio to Photography
- 11 Concert Photos That Will Bring Music to Your Ears
- Here’s a Handy Video About Photographing a Dress Made Entirely of… Well, Hands
- The Advantages of Using a Graduated Neutral Density Filter in Landscape Photography (Video)
| How to Apply the Golden Ratio to Photography Posted: 01 May 2014 11:44 PM PDT As photographers, it’s really important to know what makes a strong photograph. There are a lot of things you should keep in mind when shooting, like color, lighting, shape, and composition. It takes a variety of aspects to create an exciting image, but if you are looking for one aspect that can really help improve the quality of the composition of your photographs, the golden ratio is definitely a worthwhile concept to understand.  “Golden Ratio” captured by Great Salt Lake Photographer (Click image to see more from this photographer.) What is the Golden Ratio?So what exactly is the golden ratio? In simple terms, it is a mathematical constant that appears repeatedly in nature and artwork. Yup–believe it or not–math is really important when creating quality art. To construct a golden rectangle, choose a number that will be the length of the rectangle’s short side. For the sake of this illustration, let’s say 500 pixels. Multiply that by 1.618. The result, 809 pixels, is the length of the long side of your rectangle. Therefore, a rectangle that is 500 pixels by 809 pixels is a golden rectangle. It obeys the golden ratio.  “Untitled” captured by FDS Art (Click image to see more from this photographer.) The Rule of ThirdsIf numbers aren’t your favorite thing in the world, you can always use the rule of thirds and a grid to utilize the golden rule. The rule of thirds governs the placement of points of interest in your image. Basically, divide your image into three equal sections, horizontally and vertically, so that you have a grid over your image. This should create total of nine boxes with the lines intersecting at four points. According to the rule of thirds, the points at which the lines intersect are the ideal places for points of interest.  “Rule of Thirds Showcase” captured by What’s That Picture (Click image to see more from this photographer.) Using either of these formulas will help you in creating interest in your images. Our eyes have a tendency to follow leading lines or look at an image a certain way. By utilizing these formulas, you’ll notice that your subject will often end up being placed somewhat off center–to the left or the right–and often higher and lower in the frame, as well. That’s not to say a centered image can’t be visually pleasing, but following these guides can help you create a much more exciting image. So if you understand how the rule of thirds and golden ratio work, you will easily be able to create strong images that captivate your viewer. Our eyes tend to like images in certain ways, and by following these guidelines, you’ll help lead the viewer’s eye around your image, absorbing the details you want them to see and creating a strong visual impact. About the Author: Go to full article: How to Apply the Golden Ratio to Photography |
| 11 Concert Photos That Will Bring Music to Your Ears Posted: 01 May 2014 07:46 PM PDT You’ve only got three songs, no flash, low light, a crowd behind you, other photographers around you… and you need some really good shots! Whether you’re a pro concert photographer or you’re interested in becoming one, you’re bound to enjoy these exhilarating photos of musicians on stage in their element:  photo by Marika Hyldmar photo by Bob Lopez  photo by Ed Ace  photo by kris krüg  photo by Per Janus  photo by Brian Goldfain  photo by Marika Hyldmar  photo by Zilba Raubach  photo by Penn State  photo by Sean Molin 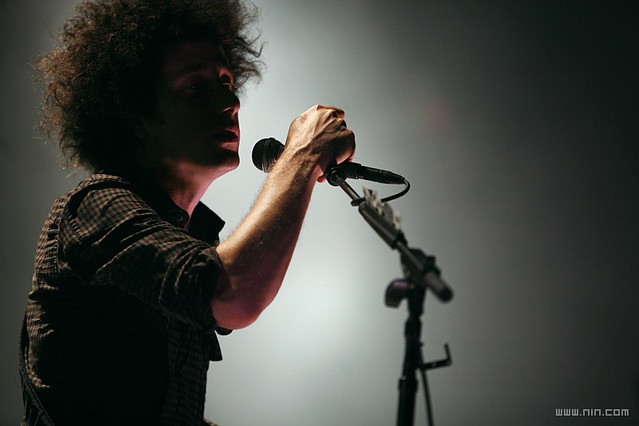 photo by Nine Inch Nails If you’re just waiting for you next gig, check out some concert photography tips before you go. Enjoy the show! Go to full article: 11 Concert Photos That Will Bring Music to Your Ears |
| Here’s a Handy Video About Photographing a Dress Made Entirely of… Well, Hands Posted: 01 May 2014 05:25 PM PDT Five months of planning. Nine hours shooting in the studio. 40 hours editing images in Photoshop. That’s what it took to complete “the most extensive (if not excessive)” project that photographer John Flury has ever attempted—a haunting composite image called “Provincial Uprising.” Watch behind the scenes as Flury hashes out the details for the project and shoots the stills necessary to realize his surrealist vision of a model wearing a dress that is composed entirely of hands: For Flury, “Provincial Uprising” tells the story of a female monarch who rules by instilling fear into her subjects. These subjugated masses make up the sum of her power and hold her reign—and even her physical well being—together. In the photo, the queen stares “in horror” at an angry uprising somewhere in her realm and contemplates how to suppress it without starting more fires.
 “Provincial Uprising” by John Flury As with “Provincial Uprising,” Flury’s goal is for each of his artworks to tell a complete story, even standing alone.
What story do you think “Provincial Uprising” tells? Go to full article: Here’s a Handy Video About Photographing a Dress Made Entirely of… Well, Hands |
| The Advantages of Using a Graduated Neutral Density Filter in Landscape Photography (Video) Posted: 01 May 2014 02:33 PM PDT Getting exposure correct when shooting in high contrast situations—such as landscapes with bright skies and dark foregrounds—is a challenge. In the video below, Bryan Peterson explores the advantages of using a graduated neutral density filter and how to use this tool to amp up your landscape images: Neutral density filters offer several advantages to photographers:
In the image below, we see the difference the filter can make. Without making the foreground of the image too dark, the neutral density filter stops down the sky, giving it a correct exposure.  Using a 3-stop graduated neutral density filter turns this photo from flat to vibrant. The top of the filter brings the exposure down three stops and gradually fades the further down the filter you go. This section of your photograph that is stopped down is controlled simply by rotating the filter around as needed. You can hold the square filters in place or use a holder that mounts to your lens. Graduated neutral density filters are a simple solution to frustrating, high-contrast lighting conditions. Go to full article: The Advantages of Using a Graduated Neutral Density Filter in Landscape Photography (Video) |
| You are subscribed to email updates from PictureCorrect Photography Tips To stop receiving these emails, you may unsubscribe now. | Email delivery powered by Google |
| Google Inc., 20 West Kinzie, Chicago IL USA 60610 | |
No comments:
Post a Comment