How to Become a Street Photographer |  |
- How to Become a Street Photographer
- Mystical 4K Timelapse of Yellowstone National Park (Video)
- A Beautiful Collection of 2014 Sony World Photography Award Finalists (Album)
- Interesting Photo of the Day: Meteor Shower Over McCloud Falls
- 6 Pro Tips for Making the Most of a Golden Hour Photo Shoot (Video)
| How to Become a Street Photographer Posted: 08 Apr 2014 06:41 PM PDT Street photography is probably one of the most difficult genres of photography, as it is based on the unknown. You can select a frame, but you can’t necessarily select the characters in it or how they will behave to make your picture look good. In modern terms, you could call street photography an art snapshot. It is a snapshot, after all. 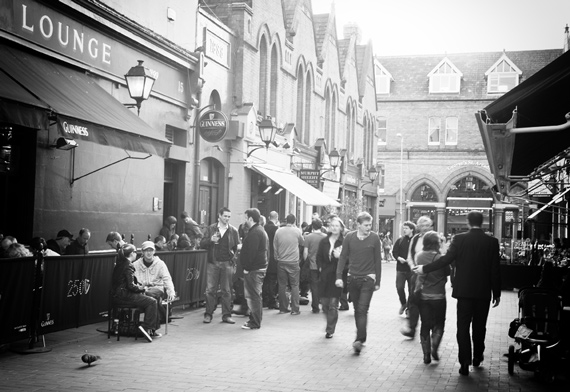 “Dublin” captured by Zdravka Zlateva (Click image to see more from Zlateva.) Shoot from the hip.There are street photographers who are like ghosts. You don’t notice them and you certainly don’t notice them photographing you. They carry small cameras and they have learned the trick of focusing the lens by judging the distance between the subject and the camera, and adjusting the focus ring based on that distance. Basically, they shoot from the hip, with wide lenses to compensate for framing defects. They don’t actually see the frame; they can only guess it. With such a behavior, it is normal not to see them. People tend to control themselves when a person aims a camera at them. By shooting without their knowledge, you can capture genuine expressions, which are the heart of street photography. 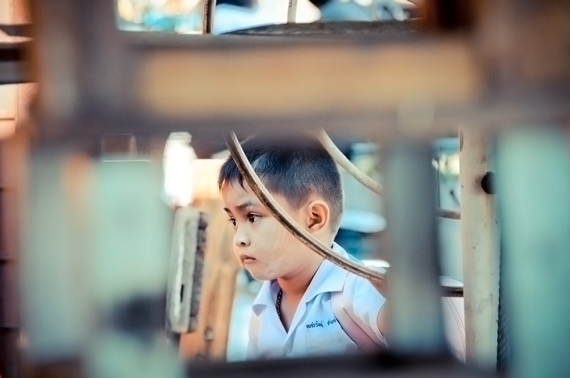 “Random Kid in Thailand” captured by Jet Rabe (Click image to see more from Rabe.) Stalk people.See a person you like, walk with them, follow them until you can get a shot of them. Go for public places so you won’t get the police on your head. Try to follow facial expressions and move like lightning when one that you like comes up. It’s all in the expression, and that’s what you’re supposed to be hunting. Never take close shots. Make the subject and the surroundings a part of your composition. Some blend in, some stand out, but that’s the diversity and the fun of it. A suit and tie in an abandoned factory looks interesting. Contrast is the key. 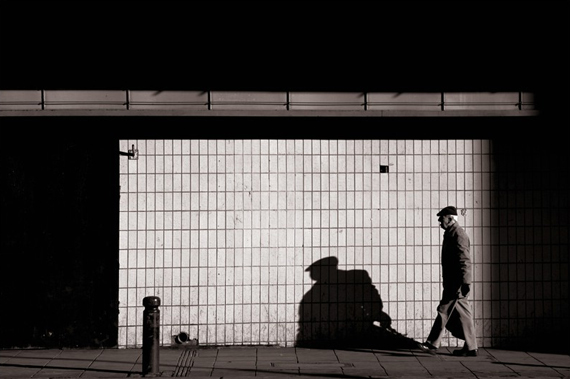 “Untitled” captured by Ferhat Celik (Click image to see more from Celik.) Carry small equipment.Do not go street photographing with big, heavy cameras and lenses that look like bazookas; people will notice you right away. Use small cameras–the smallest possible–because quality is not an issue. The best street photography in the world has some of the worst image quality as well. 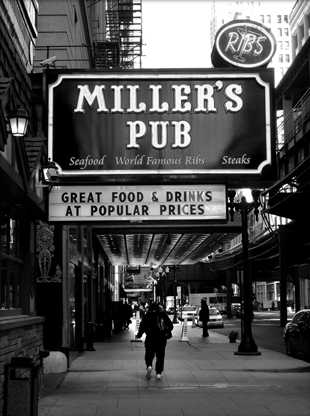 “Chicago” captured by Gary Gutiérrez (Click image to see more from Gutiérrez.) Always ask for permission.Take your shots, then talk to your subjects. It is extremely unfair and annoying to them to find out they were photographed later on, when your work becomes public. Respect them and, if required, respect their privacy. About the Author: For Further Training on Street Photography:There is an 141 page eBook that covers everything about the genre even down to specific post processing techniques that can bring the best out of street scenes. It can be found here: Essentials of Street Photography Guide Go to full article: How to Become a Street Photographer |
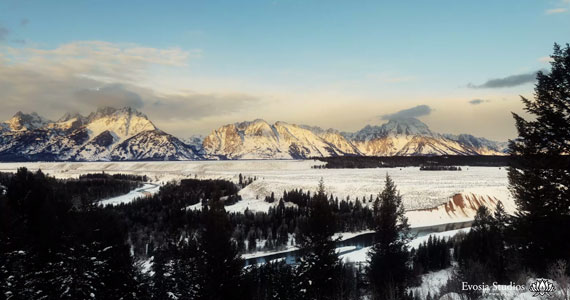
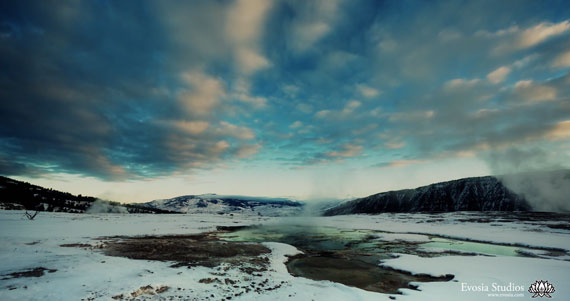
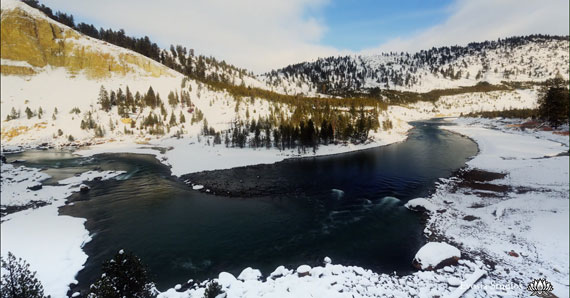
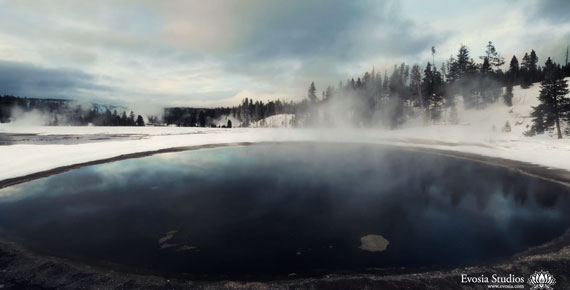
| Mystical 4K Timelapse of Yellowstone National Park (Video) Posted: 08 Apr 2014 03:21 PM PDT Yellowstone National Park is one of America’s true gems. It’s a powerful wildlife expanse of blasting geysers and unencumbered trees, filling up the northwestern corner of Wyoming, along with chunks of Idaho and Montana. If you’ve never been, this part-video, part-timelapse short film, shot entirely using Canon’s strongest 4K video, might convince you to leave immediately: The video was shot and edited by wildlife enthusiast Henry Jun Wah Lee, whose fascination with naturalism and Chinese medicine visibly seeps into his photography.
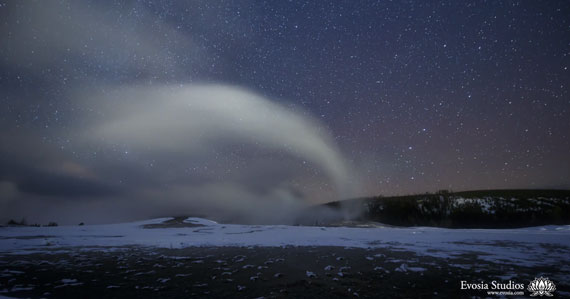
Henry achieves the incredible detail and fluidity in the video by utilizing the full force of the 4K video on his two Canon cameras, the EOS-1D C and 5D Mk III. The timelapse scenes were shot on a 5K RAW setting, and he uses an array of motion slider cranes like the Kessler Crane Cinedrive and Cineslider to achieve a graceful pan over lakes and valleys.
There’s been a lot of buzz around 4K technology lately, as companies are doling out 4K TVs and cameras in droves. Critics claim the daunting resolution (in this case, 4096×2160) won’t be discernible on smaller screens. It’s debatable whether it’s much stronger than standard HD. It certainly doesn’t do this video any harm. Go to full article: Mystical 4K Timelapse of Yellowstone National Park (Video) |
| A Beautiful Collection of 2014 Sony World Photography Award Finalists (Album) Posted: 08 Apr 2014 02:06 PM PDT Sony recently announced the 2014 winners of its expansive World Photography Awards, selected from more than 70,000 entries. The judges seemed to opt for bright colors, sharp macros, and lots of surreal imagery here—photojournalism is noticeably absent. Still, the images are pretty awesome. Here’s a small sample of a few winners from across the globe: There are dozens of finalists in smaller categories, broken down by country and age level. Winners get a few thousand dollars and a Sony Alpha a5000—not a bad prize at all. Go to full article: A Beautiful Collection of 2014 Sony World Photography Award Finalists (Album) |
| Interesting Photo of the Day: Meteor Shower Over McCloud Falls Posted: 08 Apr 2014 12:01 PM PDT Northern California provides many a photo op, with its lush forests, high mountains, gorgeous rivers and expansive lakes; it’s truly a nature photographer’s playground. In the Cascades, just southeast of Mount Shasta, runs the McCloud River, with a bunch of spring-fed streams and waterfalls. The McCloud Waterfalls are picturesque at any time of day, but capture them on a magical night, like during a meteor shower, and the scene is truly breathtaking:  “Nighted Vail” (Via National Geographic. Click to see larger size.) In this photo captured by Brad Goldpaint, you can really see nature connect with the soft texture of the cascading water against the sharp, meteorite-streaked sky. Anyone who stops to take it all in will no doubt feel at one with awe-inspiring Mother Earth. Go to full article: Interesting Photo of the Day: Meteor Shower Over McCloud Falls |
| 6 Pro Tips for Making the Most of a Golden Hour Photo Shoot (Video) Posted: 08 Apr 2014 10:26 AM PDT Nikon Ambassador Corey Rich is convinced that the secret to creating compelling outdoor portraits has very little to do with the actual location selected for the photoshoot and much to do with the photographer’s creativity and technical prowess. Rich demonstrates how to make the most of one’s shooting environment during the Sierra Nevada Mountains’ sunrise golden hour: Sometimes referred to as “magic hour,” golden hour actually happens twice a day: in the hour just after sunrise and in the hour just before sunset. Living by the old saying that “the sun waits for no one,” Rich makes a point to shoot during those time frames because they produce the most ideal outdoor lighting, perfect for shooting landscapes, portraits, and everything in between. However, those seeking to squeeze 100 percent of the magic out of sunrise’s golden hour must first do the unthinkable: wake up early. Tip #1: Arrive before the sun.Many a photographer wakes up just before sunrise and races to the designated photo shoot location just as the sun is peeking up over the horizon. While that might still yield some great images, it is far better to arrive with ample time to plan—in at least some detail—the various images you intend to make when the light is right. Actually scribbling down a list of intended shots will help the photographer to maximize his or her creative potential and harness as much “magic” as possible without running out of ideas. Rich keeps his list in his back pocket so that it’s always within reach if he needs inspiration. 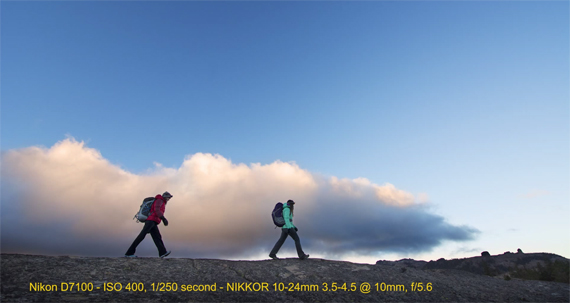 Rich found this flat granite dome and planned where his subjects would walk before the sun rose. Tip #2: Choose your gear wisely.Instead of hiking in high altitudes carrying a clunky Nikon D4 or D800, Rich opted to use the smaller Nikon D7100 during his shoot because for him, the lighter his pack, the more efficient he is during photo sessions. He also opted to bring only three three NIKKOR lenses—the 10-24mm f/3.5-5.6, the 50mm f/1.8, and the 70-200mm f/4—which gave him plenty of room for creativity, but also did not weigh him down. Tip #3: Cycle through lenses.To maximize the potential for visual diversity in a shoot, Rich believes that you should change lenses frequently. Cycling through different focal lengths and compression values keeps the creative gears in the photographer’s head turning and ultimately produces a more varied image roll.
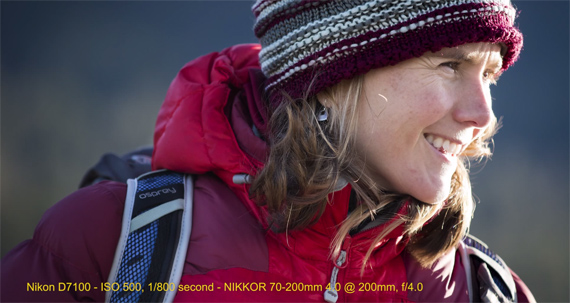 Instead of shooting this portrait with his 50mm, Rich opted to max his telephoto lens out at 200mm. Tip #4: Carefully consider the light, the composition, and the moment.Rich believes that it’s important to always keep these three factors in mind. Considering the light means thinking about the direction and quality of the light source, how it interacts with the subject, and how it affects all aspects of the image. Composition and the moment are the details that work together to tell a story. For example, to shoot his hiking portraits, Rich had to consider whether he wanted to capture the hikers’ feet in the air or on the ground as they walked. He had to contemplate the composition and seize the moment. Tip #5: Sit or lay down on the job.Don’t slack off, of course, but don’t be afraid to sit or lay down during the shoot. Often, changing levels in relation to your subjects can provide new perspectives for your images. Tip #6: Communicate with your subjects.Rich and his subjects all woke up at the crack of dawn and braved the (probably) chilly weather to make photographs. As the photographer, he could have privately fawned over each awesome image as it graced his viewfinder without involving his subjects (especially when shooting with his 70-200mm), but if he just chimped away and never involved or encouraged his subjects, they might have grown tired and even discouraged. Instead, Rich spends a good deal of time communicating during his photo shoots, because that exchange is what makes the process fun for everyone.  Hiking up and down this ridge might begin to feel pointless without encouragement.
Go to full article: 6 Pro Tips for Making the Most of a Golden Hour Photo Shoot (Video) |
| You are subscribed to email updates from PictureCorrect Photography Tips To stop receiving these emails, you may unsubscribe now. | Email delivery powered by Google |
| Google Inc., 20 West Kinzie, Chicago IL USA 60610 | |
No comments:
Post a Comment